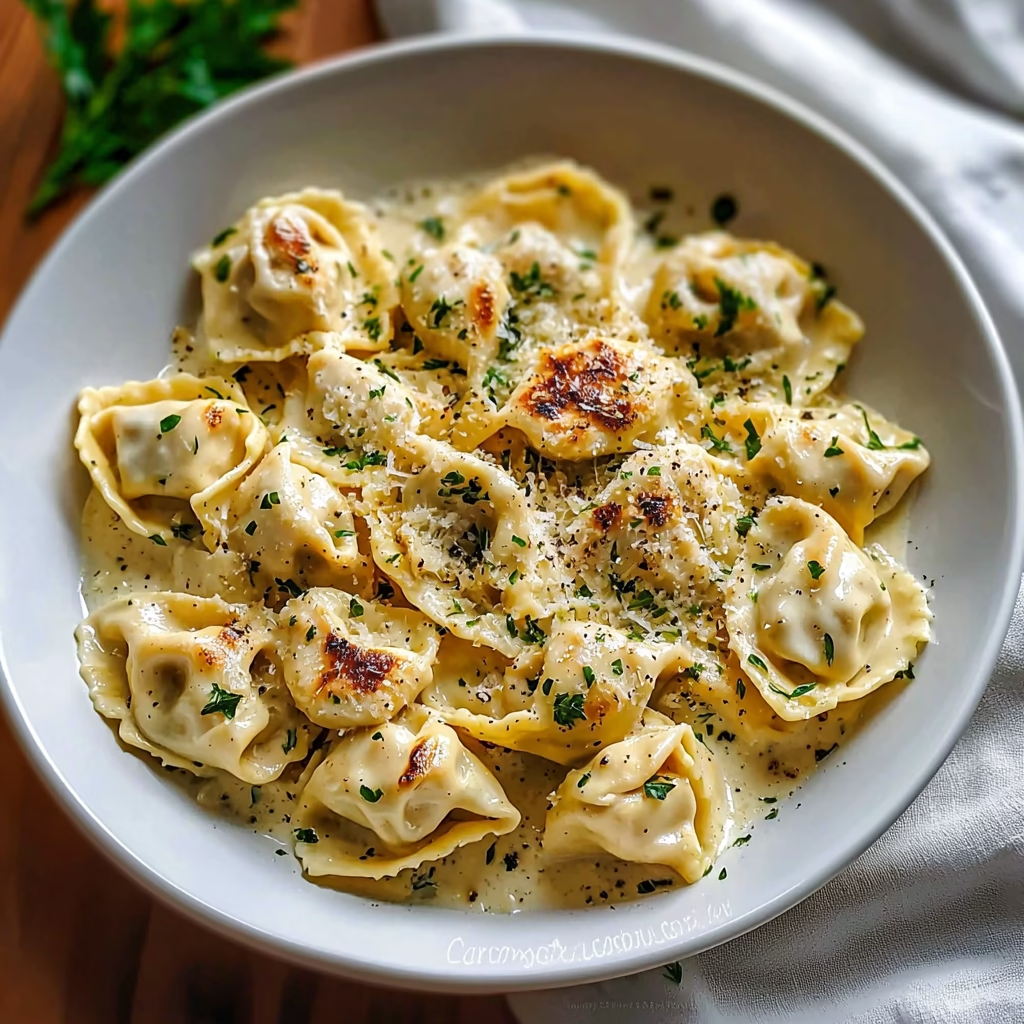
Creamy Garlic Parmesan Chicken Tortellini is the ultimate answer to those hectic weeknights when your brain is fried and your family is starving. Between soccer practices, work deadlines, and trying to maintain some semblance of a social life, the last thing any of us needs is a complicated four-hour kitchen project. This dish is a lifesaver because it combines juicy chicken, cheesy pasta, and fresh greens in a sauce so velvety you’ll want to eat it with a spoon. Creamy Garlic Parmesan Chicken Tortellini brings that high-end Italian bistro vibe straight to your dining room table in under thirty minutes, making you look like a total culinary rockstar without the stress.
What is Creamy Garlic Parmesan Chicken Tortellini?
This dish is a glorious “mash-up” of classic Italian comfort and American convenience. It starts with tender, golden-seared chicken breast strips seasoned with a smoky, garlicky rub. We then toss in plump cheese tortellini—the kind you find in the refrigerated aisle that cooks in a heartbeat—and fresh broccoli florets for a pop of color and nutrition. Everything gets swaddled in a luxurious sauce made from fresh garlic, half-and-half, and a generous amount of real parmesan cheese. It is a one-pan-inspired wonder that hits every single flavor note: salty, savory, and rich.
Reasons to Try Creamy Garlic Parmesan Chicken Tortellini
If you are dealing with picky eaters who think “green” is a forbidden color, this recipe is your secret weapon. The creamy parmesan sauce acts like a magic cloak, making broccoli suddenly acceptable to toddlers and husbands alike. Plus, it is incredibly fast; we are talking ten minutes of prep and fifteen minutes of cooking. Unlike heavy restaurant pastas that leave you feeling like you need a three-day nap, the addition of chicken broth and fresh broccoli keeps this version feeling balanced. It is also a fantastic “clean out the fridge” meal, as the sauce works with almost any vegetable or protein you have on hand.
Ingredients Needed to Make Creamy Garlic Parmesan Chicken Tortellini
- Chicken Breasts: 450g boneless, skinless, sliced into bite-sized strips.
- Garlic Powder: 1 tsp for that deep, savory base.
- Smoked Paprika: 0.5 tsp to add a gorgeous golden hue and a hint of woodsy flavor.
- Sea Salt & Cracked Black Pepper: 0.5 tsp and 0.25 tsp respectively to make those flavors pop.
- Cheese Tortellini: 1 lb (chilled or fresh) because life is too short for dry pasta.
- Broccoli Florets: 2 cups, cut small so they cook quickly and evenly.
- Fresh Garlic: 4 cloves, minced (don’t be shy here!).
- Low-Sodium Chicken Broth: 0.5 cup to deglaze the pan and add depth.
- Half and Half: 1 cup for that signature silky texture.
- Parmesan Cheese: 75g, freshly grated (please skip the green shaker can!).
- Unsalted Butter: 1 tbsp for sautéing.
- Olive Oil: 15ml for searing the chicken.
- Red Pepper Flakes: 1 pinch for just a tiny bit of “oomph.”
Instructions to Make Creamy Garlic Parmesan Chicken Tortellini – Step by Step
Step 1: Prep and Season the Protein
First things first, grab your sliced chicken and toss it into a bowl. Sprinkle in your garlic powder, smoked paprika, sea salt, and black pepper. Use your hands or a spoon to make sure every single piece of chicken is coated. This Step by Step process ensures that the spices create a beautiful crust when they hit the hot oil, rather than just floating away in the sauce later.
Step 2: Searing the Chicken to Golden Perfection
Heat your olive oil in a large 30cm skillet over medium-high heat. Once the oil shimmers, add the chicken in a single layer—don’t crowd the pan, or it will steam instead of brown! Let it sit undisturbed for about 3-4 minutes per side. When it looks like it belongs on a magazine cover, move it to a separate plate and try not to snack on too many pieces yet.
Step 3: The Quick Pasta and Veggie Boil
While your chicken is doing its thing, get a big pot of salted water rolling. Drop in your cheese tortellini and the broccoli florets together. Since the pasta is fresh or chilled, it only needs 2-4 minutes. You’ll know it is ready when the tortellini starts floating like little clouds. Drain them well and set them aside.
Step 4: Sautéing the Aromatics
Turn your skillet heat down to medium. You don’t want to burn the garlic! Melt that tablespoon of butter and toss in the minced garlic. Stir it constantly for about 30 to 45 seconds. Your kitchen should now smell like a five-star steakhouse.
Step 5: Deglazing the Skillet
Pour in that half-cup of chicken broth. While it bubbles, use a wooden spoon to scrape up all those little brown bits stuck to the bottom of the pan—that’s where the “liquid gold” flavor lives. This Step by Step technique is what separates home cooks from chefs.
Step 6: Building the Creamy Base
Slowly stir in the half-and-half and that pinch of red pepper flakes. Bring the mixture to a very gentle simmer. Keep an eye out for those tiny bubbles forming at the edges; you don’t want a rolling boil here, or the cream might break.
Step 7: The Cheese Transformation
Now for the best part: the parmesan. Gradually whisk in your freshly grated cheese. Stir it constantly until the sauce thickens up enough to coat the back of a spoon. It should look glossy and smell incredible.
Step 8: Bringing the Family Together
Toss the cooked chicken, drained tortellini, and steamed broccoli back into the skillet. This is the “homecoming” for all your hard work.
Step 9: The Final Flavor Toss
Gently fold everything together for about one minute. This allows the pasta to soak up some of that garlic parmesan goodness. This final Step by Step movement ensures every nook and cranny of the tortellini is filled with sauce.
Step 10: Serve Immediately
Plate it up while the sauce is at its peak silkiness. If you wait too long, the pasta will drink up all the sauce, and while it will still taste great, you’ll miss that beautiful “glossy” finish.
What to Serve with Creamy Garlic Parmesan Chicken Tortellini
Since this is a pretty rich and hearty meal, you’ll want something bright to balance it out. A simple arugula salad with a lemon-vinaigrette dressing is a total winner. If you are feeling extra indulgent (and who isn’t?), some warm, crusty garlic bread is perfect for mopping up the extra sauce. A crisp glass of Pinot Grigio or even a sparkling water with a lime wedge works wonders to cut through the creaminess.
Key Tips for Making Creamy Garlic Parmesan Chicken Tortellini
The biggest tip I can give you is to grate your own parmesan. Pre-shredded cheese is coated in cellulose (basically wood pulp) to keep it from sticking, which means it won’t melt smoothly into your sauce. Also, don’t overcook the tortellini! Since it goes back into the warm sauce for a final toss, aim for “al dente” during the boil so it doesn’t turn into mush. If your sauce gets too thick too fast, just add a splash of extra chicken broth to loosen it back up.
Storage and Reheating Tips Creamy Garlic Parmesan Chicken Tortellini
If you actually have leftovers—which is rare—store them in an airtight container in the fridge for up to three days. When reheating, the sauce will likely have thickened significantly. To bring back that creamy texture, add a splash of milk or water before microwaving or heating on the stovetop. Stir it gently as it warms up to redistribute the fats and keep it from getting oily.
FAQs
Can I use frozen broccoli? Absolutely! Just make sure to steam it or thaw it well so it doesn’t water down your beautiful sauce.
Is there a chicken substitute? Shrimp is a fantastic alternative, or you can go meatless and add extra mushrooms or sun-dried tomatoes.
Can I use heavy cream instead of half-and-half? Yes, it will just be even richer and thicker. If you go that route, you might need a little extra broth to balance the consistency.
Final Thoughts
There you have it—a restaurant-quality meal that fits into your busy schedule. Creamy Garlic Parmesan Chicken Tortellini is proof that you don’t need to spend hours over a stove to serve something that feels special and nourishing. It’s warm, it’s comforting, and it’s virtually guaranteed to result in clean plates and happy faces. So, the next time you’re staring at the fridge wondering what to make, remember this Step by Step guide and treat yourself to a bowl of cheesy, garlicky heaven.
PrintCreamy Garlic Parmesan Chicken Tortellini: A Comforting Italian-American Classic
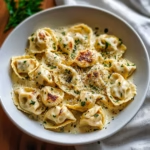
A rich and creamy Italian-American dish combining tender chicken, pillowy tortellini, and a luscious garlic parmesan sauce in one pot. Perfect for busy weeknights, it delivers restaurant-quality comfort in under an hour with minimal effort.
- Prep Time: 10
- Cook Time: 30
- Total Time: 40
- Yield: 4 servings
- Category: Dinner
- Method: Stovetop Cooking
- Cuisine: Italian-American
- Diet: Non-Vegetarian
Ingredients
1 lb boneless, skinless chicken breasts, cubed
16 oz frozen cheese tortellini
3 tbsp unsalted butter
3 cloves garlic, minced
1 tbsp olive oil
1/4 cup all-purpose flour
1 1/2 cups whole milk
1/2 cup freshly grated Parmesan cheese
Salt and black pepper to taste
Optional: 1/2 cup shredded mozzarella cheese
Instructions
Heat olive oil in a large skillet over medium heat. Add chicken and cook until browned and nearly cooked through, about 5 minutes. Push chicken to one side of the pan. Melt butter in the same pan, then sauté garlic until fragrant, about 1 minute. Sprinkle in flour and stir to combine, creating a roux. Gradually pour in milk, whisking continuously to prevent lumps. Bring mixture to a gentle simmer and cook until thickened, about 5 minutes. Add cooked chicken to the sauce, stir to coat. Season with salt and pepper. Spoon sauce into the pan with tortellini, cover, and cook for 4-5 minutes until tortellini are heated through and cheese is melted. Stir in Parmesan cheese (and optional mozzarella, if using) until well combined. Cook just until sauce is creamy and bubbly. Serve warm.
Notes
To save time, use thawed tortellini directly from the refrigerator. For a heartier texture, toss cooked tortellini with pasta before adding to the recipe. Gluten-free tortellini is an excellent alternative for dietary restrictions. Store leftovers in an airtight container in the refrigerator for up to 3 days.