Mint Chocolate Chip Ice Cream Cake is your new go-to summer (or anytime) dessert. If your taste buds do backflips at the thought of cool mint and rich chocolate dancing together in perfect harmony, then buckle up, because this cake is what dreams are made of. This dessert doesn’t require an oven, complicated techniques, or a pastry degree from Paris.
It’s built with humble, store-bought ingredients—Oreos, mint chocolate chip ice cream, Cool Whip, and good ol’ hot fudge—and somehow turns into something that’ll make people think you secretly moonlight as a pastry chef. Whether you’re dealing with a summer birthday, a last-minute potluck, or you’re just craving something sweet, cool, and wildly satisfying, this mint chocolate chip ice cream cake has your back. It’s no-churn, no-stress, and absolutely no judgment if you sneak a piece straight from the pan at midnight (we’ve all been there).
Table of Contents
What is Mint Chocolate Chip Ice Cream Cake?
Mint Chocolate Chip Ice Cream Cake is a layered frozen dessert built from nostalgic favorites: crushed Oreo cookies, mint chocolate chip ice cream, gooey hot fudge sauce, and fluffy Cool Whip. Think of it as the sweet cousin of a classic icebox cake—but with way more personality and that iconic minty chill. The layers are simple: buttery Oreo crumbs form a crust, then comes a layer of rich fudge, followed by softened mint chocolate chip ice cream, more fudge, and finally a cloud of whipped topping.
It’s all frozen into one glorious slab of happiness. You don’t bake it, you don’t churn anything, and yet you get this creamy, crunchy, chocolatey mint explosion in every bite. It’s like your favorite childhood birthday party dessert—but updated and way easier to make. This cake serves up big “wow” factor with very little actual work. Now that’s the kind of recipe we can get behind.
Reasons to Try Mint Chocolate Chip Ice Cream Cake
First off, if you love mint and chocolate, this one’s a no-brainer. But even if you’re just lukewarm on ice cream cakes, this one may convert you. Why? One: it’s ridiculously easy. We’re talking 7 ingredients, no oven, and minimal prep. Two: it looks impressive. The layers are pretty, and when you cut into it, folks will ooh and aah like you just pulled off a wedding cake. Three: it keeps in the freezer for up to a month—so it’s the ultimate make-ahead dessert. Four: it’s a crowd-pleaser. Kids devour it.
Grown-ups sneak seconds. Even picky eaters magically “like mint now.” And five: it’s flexible. Want to swap out the Cool Whip for homemade whipped cream? Go for it. Add chopped Andes mints on top? Yes, please. It’s also a great way to beat the heat without turning your kitchen into a sauna. Honestly, what’s not to love?
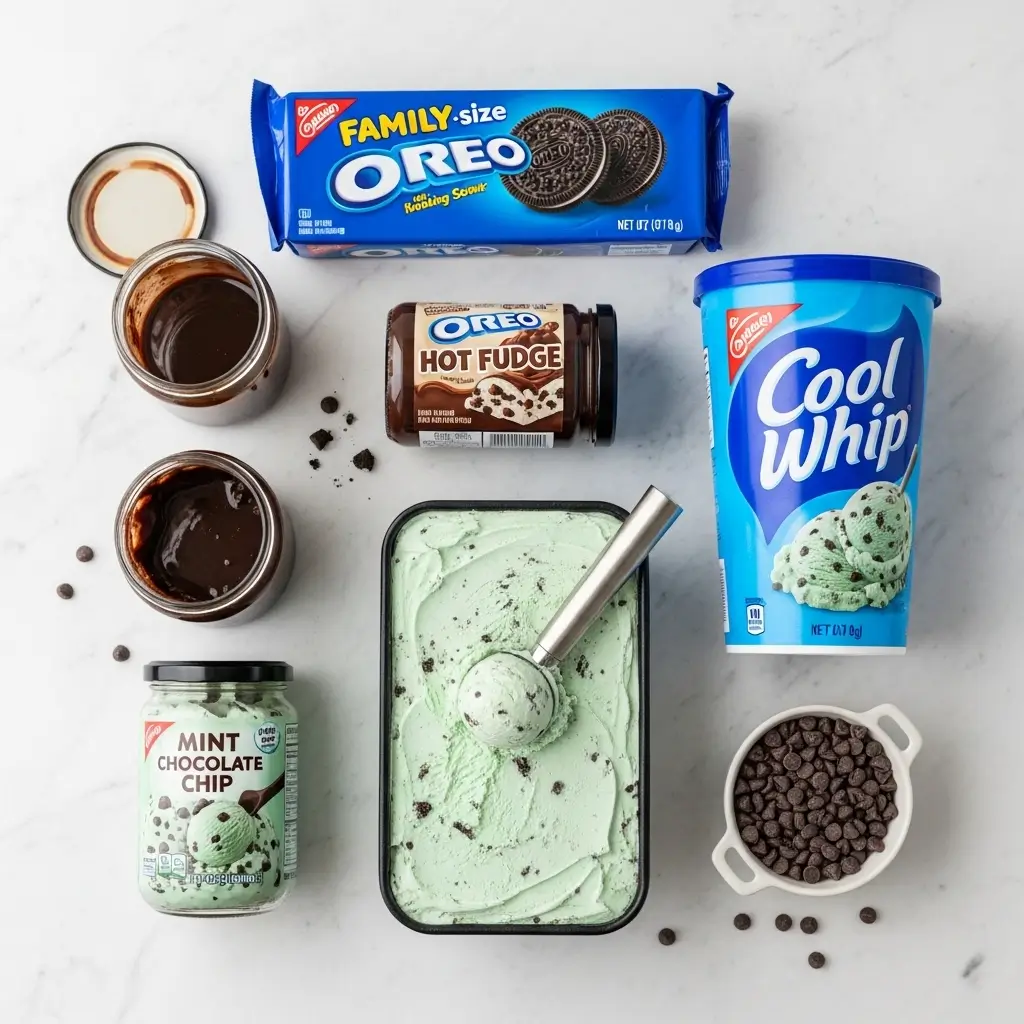
Ingredients Needed to Make Mint Chocolate Chip Ice Cream Cake
- 14.3 ounces classic Oreo cookies
- 6 tablespoons melted butter
- 1.5 quarts mint chocolate chip ice cream
- Two 11.75 oz. jars of hot fudge sauce
- 16 oz. Cool Whip (thawed)
- ½ cup mini chocolate chips (optional for garnish)
Instructions to Make Mint Chocolate Chip Ice Cream Cake
Making this Mint Chocolate Chip Ice Cream Cake is a breeze when you follow this step by step guide. Whether you’re new to no-bake desserts or just want a simple win in the kitchen, this method breaks it all down in easy, approachable stages. Don’t worry—no fancy gadgets or pastry techniques required here. Just layer, freeze, and enjoy!
If you’re short on time or new to dessert prep, check out our preparation tips for stress-free kitchen success.
Step 1: Soften the Ice Cream
Step by step, start by pulling your mint chocolate chip ice cream out of the freezer. Let it sit on the counter for about 20 minutes—not long enough to melt completely, but just until it’s scoopable and easy to spread. You want a soft, creamy texture that’s pliable but not runny. If the ice cream gets too melted, pop it back in the freezer for 10 minutes. Patience here will save your layers later!
Step 2: Make the Oreo Crust
While the ice cream is softening, crush those classic Oreo cookies into fine crumbs. You can use a food processor (super quick!) or place them in a zip-top bag and crush them with a rolling pin—great for kids who want to help or anyone who needs to take out a little stress. In a bowl, mix the Oreo crumbs with melted butter until they look like wet sand. Press this mixture evenly into a 9×13 baking dish, using the bottom of a measuring cup to compact it firmly. Place it in the freezer for 10 minutes to set the crust.
Want to swap Oreos for something gluten-free or a different cookie base? Check out our ingredient substitution ideas to customize your crust.
Step 3: Layer the First Fudge
Next in our step by step method, grab one jar of hot fudge sauce. Important: do not heat it up. Cold sauce spreads better and keeps your crust intact. Spread it gently over the chilled Oreo base with a spatula. If the fudge is too thick to spread straight from the jar, you can let it sit at room temperature for 5–10 minutes—just don’t microwave it. Return the pan to the freezer for another 10 minutes to firm things up before the ice cream goes on.
Step 4: Spread the Ice Cream Layer
Now comes the heart of this mint chocolate chip ice cream cake—the creamy, minty middle. Scoop the softened ice cream onto the cold fudge layer and use a spatula or the back of a spoon to spread it evenly. Work quickly and press gently so you don’t disturb the layer below. It’ll get a little messy, but that’s okay—just focus on getting a mostly even layer across the pan. Once smoothed, place the entire dish back in the freezer and let it freeze for at least 2 hours, or until the ice cream is fully firm.
Tip: For smooth spreading and fewer sticky hands, run your spatula under hot water before using it.
Step 5: Add the Second Fudge Layer
After the ice cream has fully refrozen, it’s time to bring in the second jar of hot fudge sauce. Again, use the sauce cold and spread it gently over the firm ice cream layer. You can reserve a tablespoon or two if you’d like to drizzle it on top before serving (it’s a nice touch!). This step by step process keeps your layers clean and defined—no melting messes here.
Step 6: Top with Cool Whip
Once the fudge is spread, open your Cool Whip (thawed in the fridge, not on the counter) and spoon it on top of the cake. Spread it evenly with a spatula to create a fluffy, snowy-white topping that’s both delicious and freezer-friendly. Cool Whip holds its texture better than homemade whipped cream, especially when frozen, making it ideal for this recipe.
Need an alternative to Cool Whip? We have some great homemade whipped topping options you can try for same-day serving.
Step 7: Garnish and Freeze Again
Now comes the fun part—garnishing! Sprinkle mini chocolate chips over the top for extra crunch and visual appeal. Feeling fancy? Crushed Andes mints, chocolate curls, or even a dusting of crushed Oreos will do the trick. Once garnished, return the entire cake to the freezer for at least 30 minutes before slicing—or leave it until you’re ready to serve.
Pro Tip: Want super clean slices? Dip your knife in hot water, wipe it clean between cuts, and serve immediately. Works like a charm.
Step 8: Serve and Store
When ready to serve, take the cake out of the freezer and let it sit at room temperature for about 5–10 minutes to soften slightly for easier slicing. Then serve it up and watch it disappear!
If you have leftovers (rare, but it happens), cover the pan tightly with plastic wrap or store slices in an airtight container. This cake keeps beautifully in the freezer for up to one month.
Want more frozen dessert inspiration? Don’t miss our butternut squash and garlic herb steak bowls—they pair perfectly with a cool, creamy dessert like this.
What to Serve with Mint Chocolate Chip Ice Cream Cake
This cake is basically the Beyoncé of desserts—it shines on its own. But if you’re throwing a party or just want to round out the menu, pair it with something simple and savory to balance all that sweetness. Think grilled chicken, burgers, or light pasta salads. A scoop of fresh berries on the side can cut through the richness (plus it makes you feel like you’re being “healthy” with your dessert, right?). If it’s a birthday or celebration, serve it alongside lemonade, iced coffee, or even sparkling wine for the grown-ups. Bonus points if you’ve got some extra chocolate fudge sauce for drizzling. Just saying.
Key Tips for Making Mint Chocolate Chip Ice Cream Cake
- Soften, don’t melt, your ice cream. If it’s too liquidy, it’ll mess up your layers.
- Use cold fudge sauce. Hot fudge will melt the ice cream and turn your pretty layers into a puddle.
- Freeze between layers. Yes, it adds time, but it keeps things clean and layered—not a minty avalanche.
- Want cleaner slices? Run a knife under hot water before cutting. Wipe it clean between each slice for picture-perfect squares.
- Cool Whip > Whipped Cream for freezing. Cool Whip holds its shape better in the freezer. Save the homemade whipped cream for serving on the side if you want to get fancy.
- Add toppings at the last minute if you’re not serving it right away. This keeps things from getting soggy.
Storage and Reheating Tips for Mint Chocolate Chip Ice Cream Cake
Okay, so you’re lucky enough to have leftovers. First, wrap the dish tightly with plastic wrap or foil, or transfer slices to an airtight container. It’ll keep in the freezer for up to a month (though honestly, it probably won’t last that long). Want to freshen it up before serving again? Let it sit at room temp for 5–10 minutes before slicing. Don’t microwave it—this isn’t that kind of cake. And don’t refreeze once it’s been sitting out for too long—it’ll get icy and weird. Instead, just make a second cake. Trust us, it’ll go fast.
FAQs
Can I use a different ice cream flavor?
Absolutely. Go wild. Coffee, cookies and cream, or even peanut butter swirl would all be amazing. Just adjust your fudge-to-flavor balance.
Can I make this ahead of time?
Yes! That’s one of the best parts. Make it up to 3 days in advance for peak freshness, or freeze it for up to a month.
What can I use instead of Cool Whip?
Stabilized whipped cream works if you’re serving the cake right away, but for freezing, Cool Whip wins on texture and staying power.
Can I make this gluten-free?
Totally. Just swap in gluten-free chocolate sandwich cookies, and double-check your fudge and ice cream ingredients.
Do I need a food processor?
Nope! Just throw your Oreos into a zip-top bag and crush them with a rolling pin or the bottom of a saucepan.
Final Thoughts
Mint Chocolate Chip Ice Cream Cake is the no-bake, no-fuss dessert you didn’t know you needed—until now. It’s refreshing, rich, and ridiculously simple. Whether you’re hosting friends, celebrating a birthday, or just treating yourself because it’s Tuesday (no judgment), this cake delivers big flavor with zero drama. The layers? Silky. The crunch? Satisfying. The mint-chocolate combo? Iconic. Plus, it’s freezer-friendly and endlessly customizable. Go ahead and bookmark this one—you’ll be making it on repeat. For more delicious ideas, browse our other reader favorites that pair great with a sweet ending like this one.
Visit our Pinterest for regular slow cooker recipe updates, or join our Facebook discussions where cooking fans exchange their favorite hearty meal ideas.
PrintMint Chocolate Chip Ice Cream Cake That’s Dangerously Easy

This is the ultimate minty-chocolatey ice cream cake made with layers of hot fudge sauce, Cool Whip, ice cream, and Oreos packed into one decadent no churn dessert.
- Prep Time: 27 minutes
- Total Time: 3 hours 27 minutes
- Yield: 14 servings
- Category: Dessert
- Method: No-Bake
- Cuisine: American
Ingredients
- 14.3 ounces classic Oreo cookies
- 6 tablespoons butter, melted
- 1.5 quarts mint chocolate chip ice cream
- 2 – 11.75 oz. jars hot fudge sauce
- 16 oz. Cool Whip
- ½ cup mini chocolate chips, for garnish (optional)
Instructions
1. Set ice cream on the counter for about 20 minutes before preparing ice cream cake to soften.
2. In the bowl of a food processor, chop the Oreo cookies until they are fine crumbs. Add melted butter and pulse several times until the cookie crumb mixture is evenly combined.
3. Press cookie crumbs into a 9×13 baking dish and place in the freezer for 10 minutes to harden.
4. Spread one jar of the hot fudge sauce across the chilled cookie crust. Chill in the freezer for another 10 minutes.
5. Spread the ice cream into the pan. Press it gently with a spatula to smooth it out as much as possible. The ice cream will become very soft, but try to prevent it from melting all the way.
6. Once the ice cream has been spread smooth, return the pan to the freezer and freeze for at least 2 hours more.
7. Spread the remaining jar of hot fudge sauce over the frozen ice cream cake. (You can reserve a few tablespoons to drizzle over the top if you wish.) Top with thawed Cool Whip.
8. Garnish with a chocolate drizzle and mini chocolate chips.
9. Serve immediately or keep frozen until ready to serve.
Notes
Store: Cover tightly with plastic wrap and keep frozen for up to 1 month.
The hot fudge sauce is fairly thick – it will become thinner if you heat it, but the second layer of hot fudge (over the ice cream layer) should be put on cold or it will melt the ice cream. Be sure that the ice cream layer is frozen solid before spreading the hot fudge over. Alternatively, one or both jars can just be added over the crust and before the ice cream layer.
You can make a homemade hot fudge sauce for this cake. Chocolate syrup is too thin for this recipe.
Cool Whip will hold up better in the freezer than using fresh whipped cream.
You can top the cake with chocolate sprinkles, chopped-up Oreos, or even Andes mints.