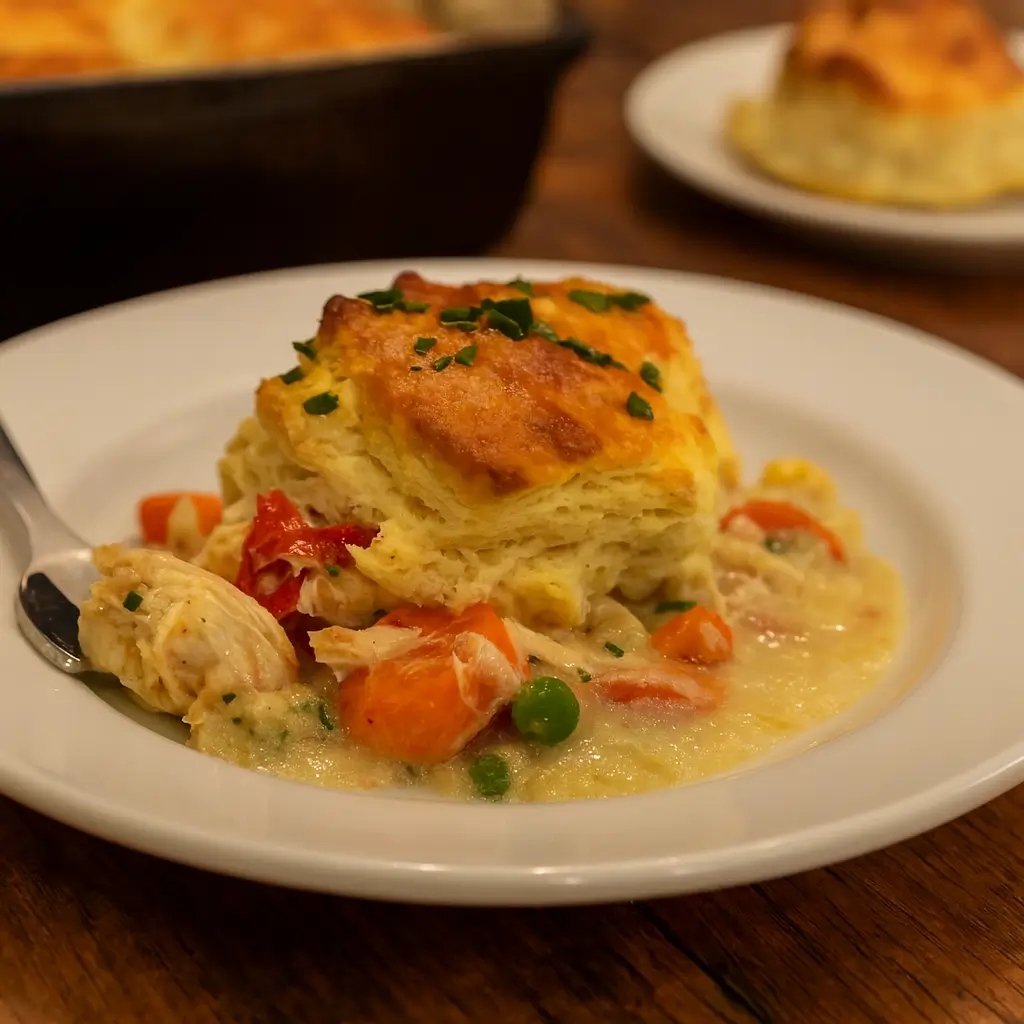
Red Lobster Biscuit Chicken Pot Pie is the comfort food mash-up you didn’t know your weeknight dinner routine was missing. Imagine all the cozy vibes of a traditional pot pie—tender chicken, creamy filling, steamy vegetables—now topped with those crave-worthy, cheesy, garlicky Red Lobster-style biscuits. Yes, it’s as amazing as it sounds. Whether you’re juggling work, picky eaters, or just want something that tastes like it took hours (but didn’t), this recipe’s got your back.
Plus, we’re all about real ingredients, real flavor, and real satisfaction. You’ll find that this version of chicken pot pie brings just enough restaurant flair to your home kitchen, without any of the chaos or waiting for a table. And the best part? You probably already have most of these ingredients in your pantry or freezer. It’s a dish that delivers on taste, warmth, and downright comfort—with zero pretension.
Table of Contents
What is Red Lobster Biscuit Chicken Pot Pie?
Red Lobster Biscuit Chicken Pot Pie is a clever twist on a classic. At its heart, it’s a rich, savory chicken and veggie filling, but instead of a pastry crust or traditional dough, it’s topped with cheesy, garlicky biscuits that taste just like the ones served at Red Lobster (you know, the ones we all “accidentally” fill up on before the meal even arrives). It’s what happens when homey comfort food meets restaurant indulgence—and it works beautifully.
The biscuits bake up golden and fluffy right on top of the creamy filling, soaking up just enough sauce to be irresistible. Whether you’re using rotisserie chicken or leftover roast from Sunday dinner, this recipe turns odds and ends into something your whole family will want seconds of. It’s hearty, satisfying, and so easy to make, you might just add it to your regular rotation.
Reasons to Try Red Lobster Biscuit Chicken Pot Pie
First off, let’s be real: who doesn’t love a good biscuit? Now imagine that biscuit soaking up all the creamy, savory goodness of chicken pot pie. That alone is a solid reason to give this dish a shot. But there’s more. For busy weeknights, it’s a true one-pan wonder—less mess, more yum. You can use rotisserie chicken (huge time-saver) and frozen veggies (no chopping necessary).
The biscuit topping mixes up fast and adds that cheesy garlic Red Lobster-style magic without a ton of effort. It’s also totally customizable: swap out veggies, spice it up with hot sauce, or sneak in some greens (your kids won’t even notice). If you’re craving something cozy, crowd-pleasing, and just indulgent enough to feel special, this dish checks every box. It’s nostalgic, comforting, and just fancy enough to make dinner feel like a treat.
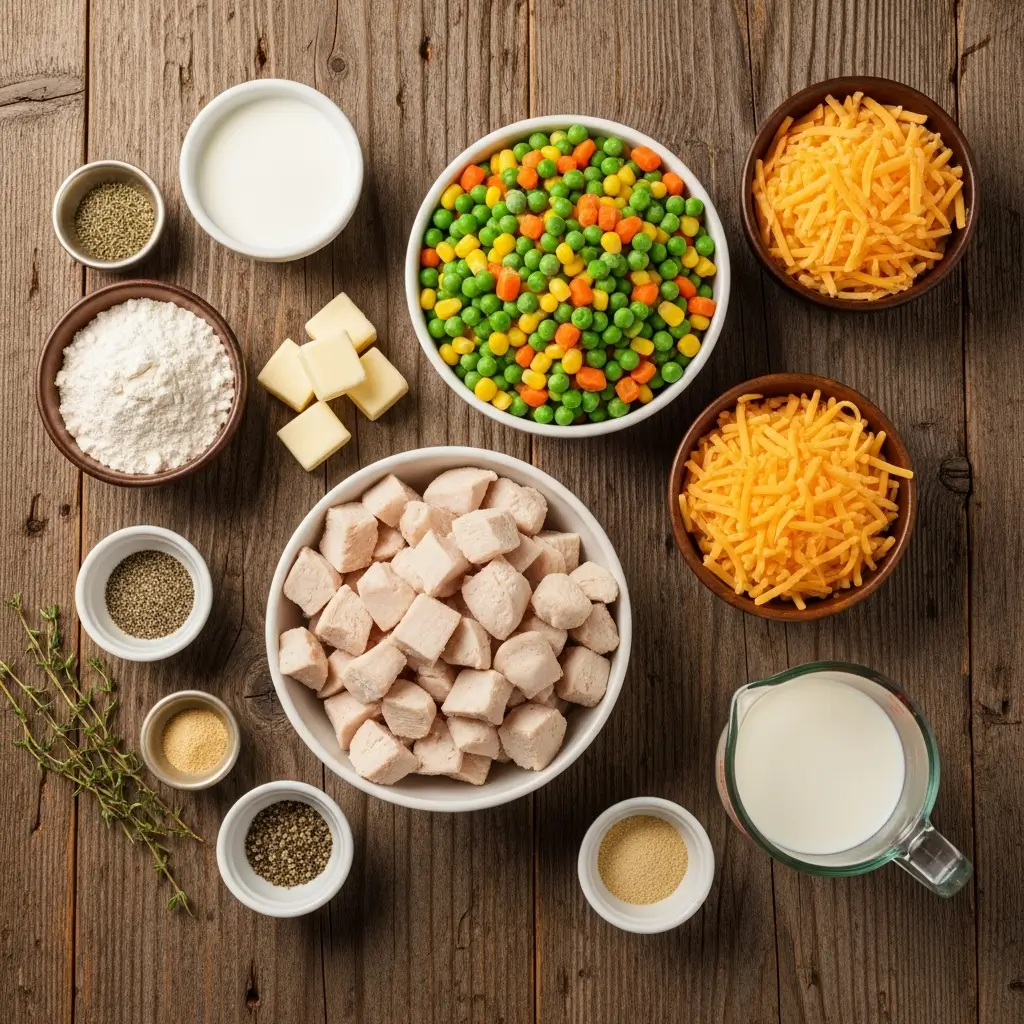
Ingredients Needed to Make Red Lobster Biscuit Chicken Pot Pie
- 3 cups cooked chicken, diced (rotisserie chicken works great)
- 1 cup frozen mixed vegetables (peas, carrots, corn)
- 1 cup cream of chicken soup
- 1 teaspoon garlic powder (for both filling and biscuit topping)
- 1 teaspoon onion powder
- Salt and pepper, to taste
- ½ cup chicken broth
- 2 ½ cups all-purpose flour
- 1 tablespoon baking powder
- 1 teaspoon salt
- ½ cup unsalted butter, cold and cubed
- 1 cup shredded cheddar cheese
- ¾ cup milk
- 1 tablespoon garlic powder (for that Red Lobster flavor biscuit magic)
Instructions to Make Red Lobster Biscuit Chicken Pot Pie
Making Red Lobster Biscuit Chicken Pot Pie at home is easier than you think—and honestly, way more satisfying than ordering out. Follow this step-by-step guide to create a creamy, biscuit-topped masterpiece that tastes like comfort in every bite. Whether you’re a weeknight warrior or a weekend meal prepper, these directions are designed to be simple, clear, and practically foolproof.
Step 1: Preheat Your Oven
Start by preheating your oven to 375°F (190°C). This is your first important step to get those biscuits perfectly golden and crisp on top. Preheating ensures that the pot pie cooks evenly and the biscuit topping rises just right. If you’re prepping ahead of time and pulling this dish straight from the fridge, add an extra 5–10 minutes to your bake time.
For more tips on oven timing and how to adjust for convection vs. conventional ovens, check out our kitchen prep essentials guide (yes, even our dip recipes come with oven know-how).
Step 2: Mix the Creamy Filling
In a large mixing bowl, combine:
- 3 cups of cooked diced chicken (we love using rotisserie to save time)
- 1 cup of frozen mixed vegetables (think peas, carrots, and corn)
- 1 cup of cream of chicken soup
- ½ cup of chicken broth
- 1 teaspoon of garlic powder
- 1 teaspoon of onion powder
- Salt and pepper to taste
Use a sturdy spoon or spatula to stir everything together until it looks thick, creamy, and evenly combined. This step is where the magic starts—it’s the base of your cozy comfort.
If you’re out of cream of chicken soup or want a homemade version, you can swap in a quick DIY substitute using a simple roux of butter, flour, and milk. Our one-pot creamy vegetable soup has a similar texture and could also inspire a totally vegetarian twist.
Step 3: Transfer to Your Baking Dish
Once your filling is smooth and seasoned to your liking, pour it into a 9×13-inch casserole dish (or a deep pie dish if you prefer). Spread it out evenly using a spatula or the back of a spoon so the biscuit topping bakes uniformly.
Set this aside while you prep the biscuit topping. Bonus tip: Place the dish on a foil-lined baking sheet to catch any bubbly overflow—because cleaning the oven is nobody’s favorite step.
Step 4: Make the Red Lobster-Style Biscuit Dough
In a separate large mixing bowl, whisk together:
- 2 ½ cups all-purpose flour
- 1 tablespoon baking powder
- 1 teaspoon salt
Now, add ½ cup of cold cubed butter. Use a pastry cutter or your fingers to blend the butter into the flour mixture until it forms coarse, pea-sized crumbs. Cold butter is key here—it’s what gives those biscuits their flaky, tender texture.
Next, stir in:
- 1 cup shredded cheddar cheese
- 1 tablespoon garlic powder
Gradually pour in ¾ cup of milk, stirring gently until just combined. Don’t overmix—this dough should be thick, a little lumpy, and slightly sticky. That’s your Red Lobster-style biscuit magic waiting to happen.
Want to switch up the cheese? Mozzarella or pepper jack works great, especially if you want a mild or spicy twist. Learn more about flavorful swaps in our Gnocchi Mac and Cheese recipe, where cheese takes center stage.
Step 5: Drop Biscuits Over the Filling
Using a large spoon or ice cream scoop, drop generous dollops of biscuit dough over the chicken filling. There’s no need to spread them perfectly—you want that rustic, homey look. Cover the surface as evenly as possible, leaving a little space between each mound for the biscuits to expand as they bake.
If you want thinner biscuits or more coverage, gently flatten the tops with the back of a spoon. Either way, you’ll end up with buttery, golden biscuit peaks hugging a rich and creamy base.
Step 6: Bake to Golden Perfection
Place the dish (on the baking sheet, remember?) into your preheated oven and bake for 30–35 minutes. You’re looking for biscuits that are golden brown and a filling that’s bubbling around the edges. That’s your sign it’s cooked through and ready.
If the biscuit tops start browning too quickly, loosely tent the dish with foil for the last 10 minutes. This step-by-step trick prevents dry or overly crisp biscuits while giving the filling time to finish simmering beneath.
Step 7: Let It Rest, Then Serve
Once it’s done baking, remove the dish from the oven and let it sit for 5–10 minutes. This short resting period lets the filling thicken and settle, making serving a whole lot easier (and safer).
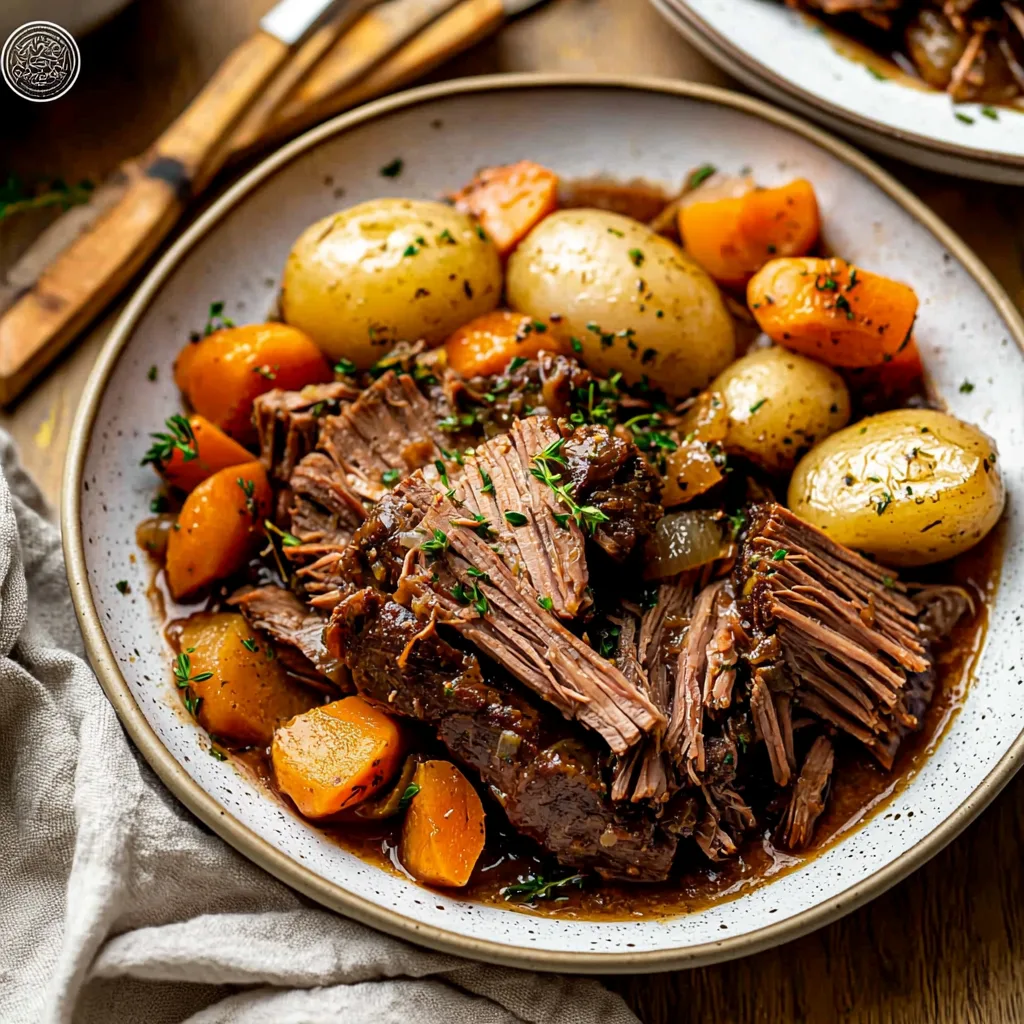
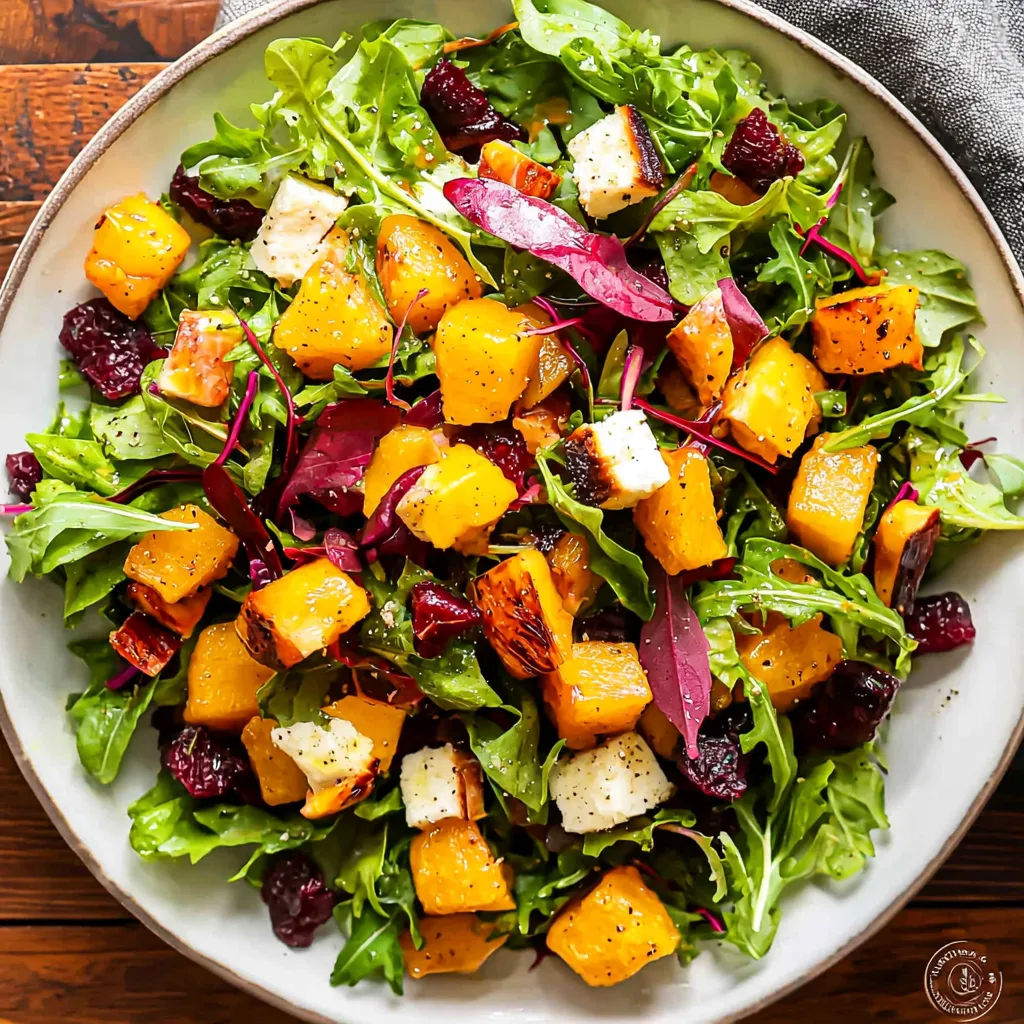
Scoop into bowls or onto plates and enjoy! For an extra layer of comfort, serve it alongside a crisp Autumn Harvest Apple and Feta Salad or some Herbed Potato Rolls to really round out the meal.
What to Serve with Red Lobster Biscuit Chicken Pot Pie
This dish is hearty enough to stand on its own, but if you’re feeding a crowd or just feel like making dinner extra special, here are a few winning sides. A crisp green salad with a light vinaigrette balances the richness—especially something like an Autumn Harvest Honeycrisp Apple and Feta Salad. Roasted veggies like carrots, Brussels sprouts, or even sweet potato rounds with honey add a little sweetness and texture.
Want to keep it cozy? Serve this with a warm soup starter, like our Lemon Ginger Turmeric Chicken and Rice Soup—it complements the pot pie without competing for attention. Oh, and don’t forget a chilled glass of white wine or sparkling apple cider. Because yes, you deserve it.
Key Tips for Making Red Lobster Biscuit Chicken Pot Pie
Use cold butter for the biscuit dough—it’s the secret to that flaky, tender texture. If you’ve got a food processor, that’s a handy shortcut for mixing it in. Don’t overmix the dough; a light touch keeps the biscuits soft. If your filling looks too thick before baking, add a splash more broth. No cream of chicken soup on hand? Make your own quick version with a butter-flour roux and milk.
Want to make it vegetarian? Swap the chicken for white beans or extra veggies, and use veggie broth instead. And if your biscuits brown too fast while baking, tent the dish with foil to protect the tops while the filling finishes bubbling. Oh—and if you’re using fresh veggies, sauté them first to soften them up. Trust us, nobody wants crunchy carrots in their pot pie.
Storage and Reheating Tips for Red Lobster Biscuit Chicken Pot Pie
Leftovers? Lucky you. Store any remaining pot pie covered in the fridge for up to 3 days. Just make sure it’s completely cooled before wrapping it up to avoid soggy biscuit tops. To reheat, the oven is your best friend—pop it back in a 350°F oven for about 15–20 minutes until warmed through. Cover it with foil to prevent the biscuits from drying out.
If you’re short on time, you can microwave individual portions, but the texture won’t be quite as dreamy. Freezing? You bet. Assemble the whole thing in a freezer-safe dish (don’t bake yet), cover tightly, and freeze for up to 2 months. When ready to bake, add an extra 15–20 minutes to the cook time and bake straight from frozen. Easy peasy.
FAQs
Can I use canned chicken instead of rotisserie?
Totally. Just make sure it’s well-drained and shredded.
Can I make this gluten-free?
Yes! Swap the flour for a 1-to-1 gluten-free blend and check your soup is gluten-free too.
Can I prep this ahead?
You can make the filling and biscuit dough in advance—just store separately and assemble right before baking.
What if I don’t have cheddar?
No worries. Mozzarella, Colby Jack, or even a little Parmesan can work in a pinch.
How do I make it spicier?
Add a pinch of cayenne to the biscuit mix or stir a little hot sauce into the filling. Go wild.
Final Thoughts
Red Lobster Biscuit Chicken Pot Pie is the kind of meal that hugs you from the inside out. It’s simple enough for a weeknight, but special enough for company. You get all the creamy, hearty joy of classic chicken pot pie—with the added bonus of those buttery, garlicky biscuits that steal the show. If you’re looking for a recipe that brings warmth to the table (and makes the whole house smell amazing), this one’s for you.
And hey, if this dish just became your new family favorite, don’t forget to try our other cozy comfort meals like Shortcut Pierogies with Marry Me Sauce or a soul-soothing Creamy Tuscan Garlic Tortellini Soup. Dinner’s about to get a whole lot cozier.
Visit our Pinterest for regular slow cooker recipe updates, or join our Facebook discussions where cooking fans exchange their favorite hearty meal ideas.
PrintRed Lobster Biscuit Chicken Pot Pie for Cozy Weeknights

This comforting Red Lobster Biscuit Chicken Pot Pie blends tender chicken, hearty vegetables, and a creamy sauce under fluffy, cheesy biscuits inspired by Red Lobster’s famous recipe. A cozy, delicious twist on a classic dish.
- Prep Time: 20 minutes
- Cook Time: 40 minutes
- Total Time: 1 hour
- Yield: 4 People
- Category: Main Course
- Method: Baking
- Cuisine: American
Ingredients
- 3 cups cooked chicken, diced (rotisserie chicken works well)
- 1 cup frozen mixed vegetables (peas, carrots, corn)
- 1 cup cream of chicken soup
- 1 teaspoon garlic powder (for filling and biscuit topping)
- 1 teaspoon onion powder
- Salt and pepper, to taste
- ½ cup chicken broth
- For the Biscuit Topping:
- 2 ½ cups all-purpose flour
- 1 tablespoon baking powder
- 1 teaspoon salt
- ½ cup unsalted butter, cold and cubed
- 1 cup shredded cheddar cheese
- ¾ cup milk
- 1 tablespoon garlic powder
Instructions
1. Preheat your oven to 375°F (190°C).
2. In a large mixing bowl, combine the cooked chicken, frozen vegetables, cream of chicken soup, garlic powder, onion powder, salt, pepper, and chicken broth. Mix until well combined.
3. Transfer the chicken filling into a casserole or pie dish and spread evenly.
4. In another bowl, whisk together flour, baking powder, and salt for the biscuit topping.
5. Cut in the cold butter with a pastry cutter or fork until the mixture resembles coarse crumbs.
6. Stir in the shredded cheddar cheese and garlic powder.
7. Gradually add the milk, mixing just until a soft dough forms. Avoid overmixing.
8. Drop spoonfuls of the biscuit dough over the chicken filling, covering it as evenly as possible.
9. Place the dish on a baking sheet and bake for 30 minutes or until the biscuit topping is golden brown and the filling is bubbling.
10. Let cool for a few minutes before serving.
Notes
Rotisserie chicken saves time and adds extra flavor.
Customize the vegetable mix based on your preferences or what’s in season.
This pot pie can be assembled ahead and refrigerated for up to 2 days—just extend baking time slightly if baking from cold.