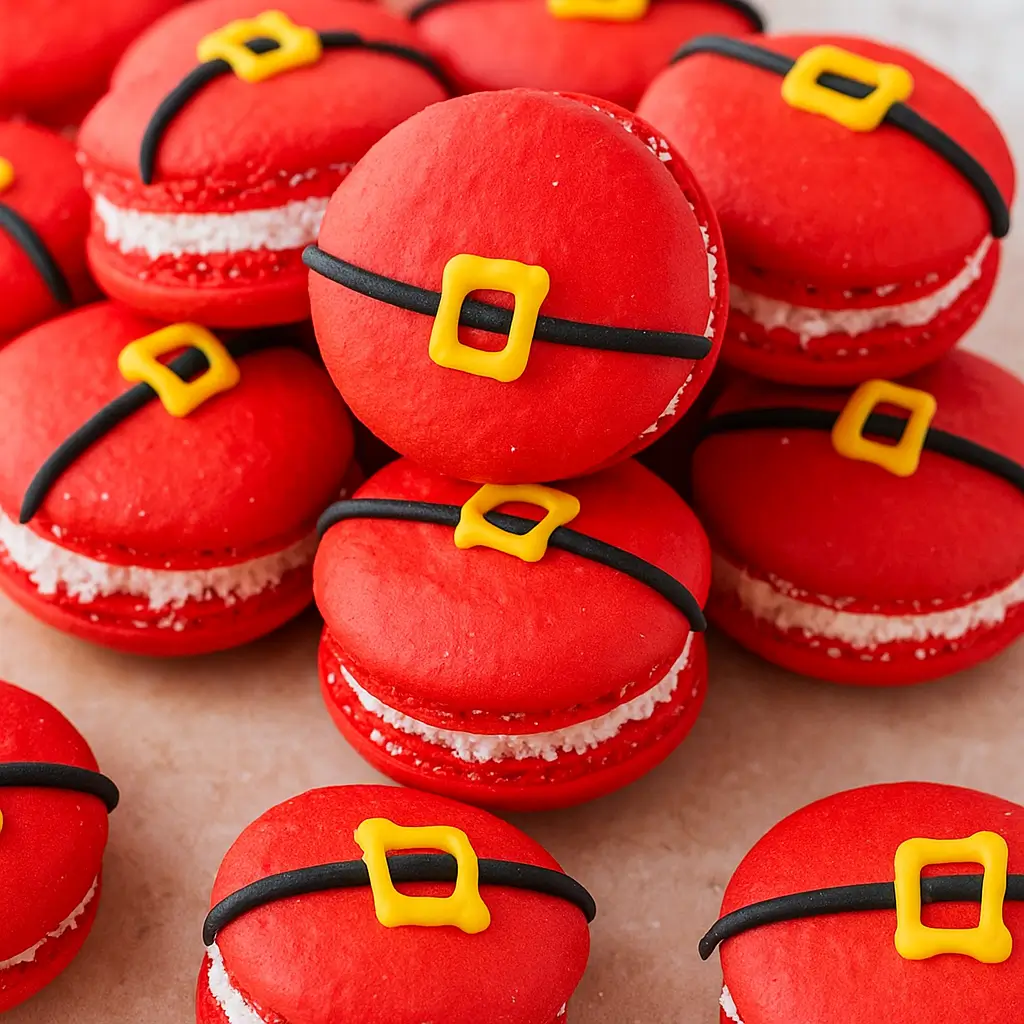
Santa Claus Macarons are the edible definition of holiday cheer. If you’ve ever dreamed of capturing Santa’s jolly vibes in a bite-sized treat, this recipe delivers that — with a fluffy beard of coconut to boot. These adorable red macarons are filled with a luscious sugar cookie buttercream (yes, you read that right), and decorated with royal icing belts that scream, “Santa’s here!” Whether you’re baking for a cookie swap, Christmas Eve dessert, or a cozy night in with hot cocoa and Hallmark movies, Santa Claus Macarons bring sparkle and sweet nostalgia to your dessert table.
Oh, and they freeze well — perfect for prepping ahead of your holiday madness. From their crispy shells to their creamy centers, Santa Claus Macarons are holiday magic, sandwiched between two almond flour cookies.
Table of Contents
What are Santa Claus Macarons?
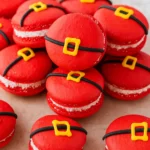
Santa Claus Macarons are charming French macarons with a festive makeover. Think classic almond meringue shells—light, airy, and slightly chewy—dyed a vibrant Santa-suit red, then decorated with a black belt and gold buckle. But the real showstopper is what’s inside: sugar cookie buttercream made with real flour and a touch of almond extract for that nostalgic cookie-dough flavor. And as if that wasn’t enough, we roll the edges in shredded coconut to mimic Santa’s fluffy white trim.
These macarons are basically Christmas in cookie form. While macarons have a bit of a reputation for being tricky, this recipe breaks it down into doable steps for home bakers. If you’re a fan of holiday baking projects that look impressive but are actually fun and satisfying to pull off, you’re going to fall in love with these little guys.
Reasons to Try Santa Claus Macarons
Besides the fact that they’re ridiculously cute? Santa Claus Macarons are the perfect mix of festive and flavorful. First off, they’re conversation starters — serve a tray of these at your holiday party, and watch them disappear faster than cookies left out for Santa. Second, they taste as good as they look. The shells have that classic crisp-chewy contrast, and the sugar cookie buttercream? It’s dreamy, creamy, and way easier than it sounds.
Third, they’re freezer-friendly, so you can make them ahead of the December chaos. And if you’re into baking with kids or hosting a cookie decorating night, this recipe turns into a festive activity — royal icing belts and all. Plus, they’re great edible gifts. Wrap a few in a clear bag with ribbon and boom: holiday hero status.
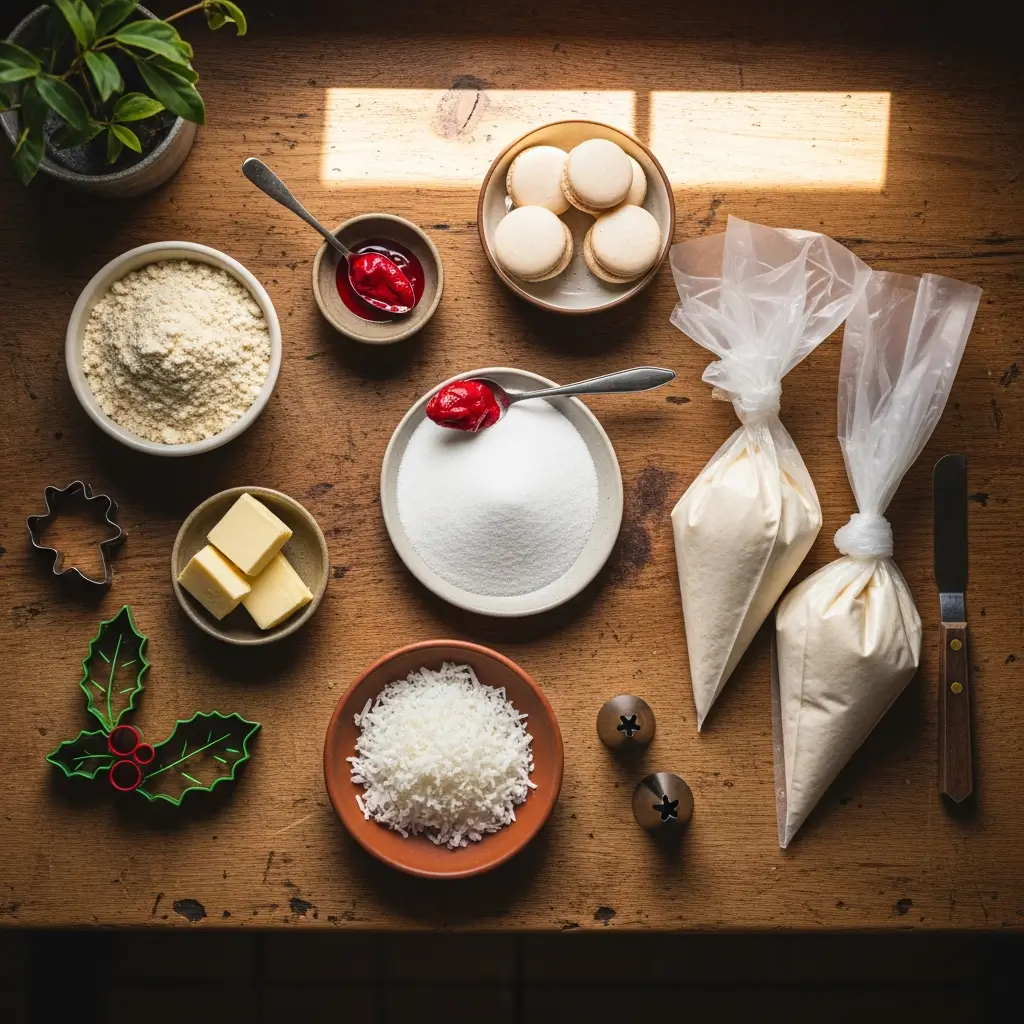
Ingredients Needed to Make Santa Claus Macarons
For the Macaron Shells:
- 100 grams Domino® Golden Sugar
- 4 grams egg white powder (optional, helps in humid climates)
- 100 grams egg whites
- 105 grams almond flour
- 105 grams Domino® Powdered Sugar
- Red gel food coloring (about 1 tbsp)
For the Royal Icing (Decoration):
- 1 1/2 cups Domino® Powdered Sugar (187 grams)
- 1 tbsp meringue powder
- 4 tbsp water
- Black and yellow gel food coloring
- Piping bags + small round tips (sizes 2 and 3)
For the Sugar Cookie Buttercream:
- 1/2 cup all-purpose flour (63 grams)
- 1/2 cup unsalted butter (113 grams)
- 1/4 cup Domino® Golden Sugar (50 grams)
- 1 1/4 cups Domino® Powdered Sugar (156 grams)
- 1 tsp vanilla extract
- 1/8 tsp almond extract
- 1/2 tbsp milk or heavy cream (if needed)
- 1/4 cup desiccated coconut, shredded (50 grams)
Instructions to Make Santa Claus Macarons
Making Santa Claus Macarons step by step might seem a bit intimidating at first glance, but trust me — once you break it down and take it one step at a time, it’s actually a fun and rewarding holiday baking project. Here’s your detailed walk-through from mixing to decorating. If this is your first time tackling macarons, check out our baking tips for beginners for a confidence boost.
Step 1: Prepare Your Baking Setup
Before you even touch a whisk, get everything in place. Macaron making moves fast once you start, and having your ingredients pre-measured will save you from a potential sugar-dusted disaster. Line two baking sheets with parchment paper or use silicone mats with macaron templates — these help keep the size consistent. Set up your piping bag with a large round tip (¼” diameter works best). A piping bag tie or clip will help seal the top and make things less messy later.
If you’ve never piped before, it’s a bit like frosting sugar cookies — just aim for uniform circles. Also, begin preheating your oven. For conventional ovens, 300°F is the sweet spot, but it’s smart to experiment. If you’re using convection, try 270°F to start and adjust as needed.
Step 2: Make the Meringue
Place a heatproof bowl over a pot of simmering water (double boiler style). Add your Domino® Golden Sugar and optional egg white powder. If you live in a humid climate, the egg white powder helps stabilize the meringue, but it’s totally fine to skip if your kitchen is dry.
Whisk the sugar mixture continuously until it’s dissolved. A quick fingertip test — if you no longer feel gritty sugar between your fingers, you’re good to go. Now pour the syrup into the bowl of your stand mixer and beat on low for 30 seconds. Gradually increase the speed to medium-high and whip until stiff peaks form. This can take up to 15 minutes. The meringue should be glossy and form peaks that stand tall with just a slight bend.
If you’re unsure what “stiff peaks” look like, think of it like this: you should be able to swirl the whisk in the bowl and feel resistance, and the meringue should collect like soft waves. This is one of the most crucial parts of making Santa Claus Macarons step by step — under or over-beating here can lead to hollow shells or cracked tops. Need extra visual guidance? Our churro cookies tutorial includes more tips on achieving the right meringue texture.
Step 3: Macaronage – Folding the Batter
Now it’s time for the macaronage — a fancy French word for folding the dry ingredients into your meringue. Sift together the almond flour and Domino® Powdered Sugar, then pour them into your whipped meringue. Add your red gel food coloring — about 1 tablespoon — and begin folding gently with a spatula.
Use the classic “J” motion: scrape down the sides and fold over. Once the dry ingredients are incorporated, begin pressing the batter against the bowl’s side to deflate it slightly and develop that flowing, lava-like consistency.
The batter is ready when you can hold the spatula over the bowl and the batter falls off in a ribbon, forming a figure 8 without breaking. This is where a lot of macaron dreams go sideways, so take your time. A properly folded batter is one of the secrets to mastering Santa Claus Macarons step by step.
Step 4: Pipe the Macaron Shells
Transfer the batter into your piping bag and pipe onto your prepped baking trays. Hold the piping bag at a 90° angle and pipe slowly, letting the batter spread into a circle before lifting and twisting the tip away.
Once piped, bang each tray firmly on the counter a few times to pop air bubbles — yes, give it a good whack! Then grab a toothpick and poke any lingering bubbles. Let the trays sit at room temperature until the tops are dry to the touch and form a slight “skin.” This drying step is non-negotiable if you want smooth tops and perfect “feet” (the signature ruffled bottoms). Depending on humidity, this can take anywhere from 20 to 60 minutes.
Step 5: Bake the Macaron Shells
Bake one tray at a time in your preheated oven. Each batch typically takes 15 to 20 minutes, but that depends on your oven’s quirks. Look for deeper color and a firm shell. The tops should not wobble when gently nudged. If they still feel soft or look shiny, they need more time. When done, let them cool completely on the tray — warm macarons are delicate and can crack if moved too early.
Step 6: Make the Royal Icing Decorations
While your shells cool, whip up the royal icing for Santa’s belt. In a small mixing bowl, combine Domino® Powdered Sugar, meringue powder, and water. Beat until the icing is glossy and has the consistency of sweetened condensed milk. Not too runny, not too stiff.
Divide into two bowls: dye one black for the belt and the other yellow for the buckle. Pipe a horizontal black line across half your shells (these will be the tops). Let it dry slightly, then pipe a yellow square buckle in the center. Store your icing bags covered — this icing dries fast and crusts over if left exposed.
Want other creative decorating ideas? Browse our caramel apple spice cake for more festive flair inspiration.
Step 7: Make the Sugar Cookie Buttercream
Start by heat-treating the flour — spread it on a baking sheet and bake at 350°F for 5 minutes. This makes it safe to eat raw in frosting. Once cooled, beat the unsalted butter, Domino® Golden Sugar, and powdered sugar until fluffy and creamy (about 4-5 minutes). Add vanilla and almond extracts for that classic sugar cookie flavor. If the frosting seems too thick, add a splash of milk or cream. If it’s too soft, add more powdered sugar.
This buttercream is the heart of your Santa Claus Macarons — sweet, nostalgic, and wonderfully pipeable.
Step 8: Assemble the Macarons
Pipe a swirl of buttercream onto the undecorated bottom shells. Sandwich with a decorated top shell, pressing gently until the filling reaches the edges. Then comes the fun part — roll the macaron edges in shredded coconut to give Santa his fluffy suit trim. It adds texture, flavor, and serious holiday vibes.
Step 9: Rest and Serve
Yes, more patience — macarons need a rest. Place the finished macarons in an airtight container and refrigerate for at least 24 hours before serving. This helps the shells absorb moisture from the buttercream and become perfectly chewy. When ready to serve, let them sit at room temperature for about 30 minutes for the best flavor and texture.
What to Serve with Santa Claus Macarons
Santa Claus Macarons are perfect with a cozy cup of hot cocoa (peppermint or spiked, your call), or even mulled wine if you’re feeling fancy. They also pair beautifully with a dessert board filled with Biscoff Blondies, Easy Cinnamon Apple Cake, and some classic sugar cookies for good measure. If you’re serving them at a holiday brunch or after-dinner gathering, consider a cheese board on the savory side to balance all the sweetness. These little guys are sweet, so keep pairings simple and cozy.
Key Tips for Making Santa Claus Macarons
Macarons are a bit like toddlers — temperamental but totally worth it. First, make sure you sift your dry ingredients. It makes a huge difference. Second, watch your meringue — you want stiff peaks, not dry chunks. Don’t overbeat. Third, rest your shells. We know you’re excited, but if they go into the oven without forming a skin, they’ll crack. Fourth, if your royal icing’s too runny or too thick, tweak it with water or sugar — it’s forgiving. And finally, roll the edges in coconut while the buttercream is fresh so it sticks. Store in the fridge to keep that buttercream dreamy, but let them come to room temp before serving. Trust me, that’s when they shine.
Storage and Reheating Tips for Santa Claus Macarons
Store assembled Santa Claus Macarons in an airtight container in the fridge for up to 5 days. They actually taste better after a day or two — the filling softens the shell just enough. For longer storage, freeze them in a single layer, then transfer to a zip bag. They’ll keep in the freezer for up to 2 months. Just let them thaw in the fridge overnight, then bring to room temp before serving. No need to reheat — they’re meant to be enjoyed cool and creamy.
FAQs
Can I make the shells ahead of time?
Yes! You can bake the shells and freeze them for up to 2 months.
Do I need egg white powder?
Only if you live in a humid climate. Otherwise, skip it.
Can I use a different filling?
Sure — churro buttercream or peppermint ganache would be fun holiday twists.
How do I know my batter is ready?
It should flow slowly off the spatula and you should be able to draw a figure 8 without it breaking.
Can I skip the coconut?
Yep! But it really adds to the Santa look.
Final Thoughts
Santa Claus Macarons are more than just pretty cookies — they’re little edible gifts that bring joy with every bite. Whether you’re making them for a holiday gathering or gifting them to friends and neighbors, these festive treats are guaranteed to earn smiles (and maybe a few “wow, did you make these?!” compliments). The key is to have fun with it.
Decorating might get a little messy, and the macaron process might test your patience, but the result is seriously worth it. If you’re in the mood for more cozy desserts, check out our Caramel Apple Spice Cake or Best Scalloped Sweet Potatoes for a full-on festive feast. Happy baking — and don’t forget to save one for Santa!
Visit our Pinterest for regular slow cooker recipe updates, or join our Facebook discussions where cooking fans exchange their favorite hearty meal ideas.
PrintSanta Claus Macarons with Sugar Cookie Filling
These festive Santa Claus Macarons are filled with a sugar cookie buttercream and topped with adorable royal icing decorations to resemble Santa’s belt. Perfect for holiday baking, these sweet treats are as fun to make as they are to eat.
- Prep Time: 2 hours
- Cook Time: 40 minutes
- Total Time: 1 hour 40 minutes
- Yield: 22 macarons
- Category: Dessert
- Method: Baking
- Cuisine: American
- Diet: Vegetarian
Ingredients
Macaron Shells:
- 100 grams Domino® Golden Sugar
- 4 grams egg white powder (optional)
- 100 grams egg whites
- 105 grams almond flour
- 105 grams Domino® Powdered Sugar
- Red gel food coloring (about 1 tbsp)
Royal Icing:
- 1 1/2 cups Domino® Powdered Sugar (187 grams)
- 1 tbsp meringue powder
- 4 tbsp water
- 2 drops black gel food coloring
- 1 drop yellow gel food coloring
Sugar Cookie Buttercream:
- 1/2 cup all-purpose flour (63 grams)
- 1/2 cup unsalted butter (113 grams)
- 1/4 cup Domino® Golden Sugar (50 grams)
- 1 1/4 cup Domino® Powdered Sugar (156 grams)
- 1 tsp vanilla extract
- 1/8 tsp almond extract
- 1/2 tbsp milk or heavy cream
- 1/4 cup desiccated coconut (50 grams)
Instructions
1. Line two baking sheets with parchment or silicone mats. Sift almond flour and powdered sugar together. Set aside.
2. Place a bowl over a simmering pot of water. Add granulated sugar and egg white powder, if using. Whisk in egg whites until sugar dissolves.
3. Transfer mixture to a stand mixer and whip to stiff peaks.
4. Fold in sifted dry ingredients and red food coloring. Mix until batter flows off spatula in ribbons and forms figure 8.
5. Transfer to piping bag fitted with round tip. Pipe onto prepared trays. Tap trays to remove air bubbles and pop any visible with a toothpick.
6. Let shells rest until dry to the touch. Bake at 300°F for 15–20 minutes, one tray at a time. Let cool completely.
7. Make royal icing by whipping powdered sugar, meringue powder, and water until thick and glossy. Divide and color black and yellow. Pipe a black belt across half of the shells, then add a yellow buckle.
8. For the buttercream, heat treat flour at 350ºF for 5 minutes. Cool. Beat butter and sugars for 4–5 minutes. Add cooled flour, extracts, and cream. Adjust texture with more sugar or cream as needed.
9. Pipe buttercream onto plain macaron shells. Top with decorated shell and roll sides in shredded coconut.
10. Refrigerate assembled macarons for at least 24 hours for best flavor. Store in fridge for up to 5 days or freeze for up to 2 months.
Notes
Use egg white powder if your environment is humid for more stable meringue.
Let macarons mature in the fridge for optimal texture and flavor.
Avoid overwhipping or underwhipping the meringue to prevent hollow shells.
Keep royal icing covered while working to prevent it from drying out.