Herbed Potato Rolls are the cozy, carb-loaded comfort food you didn’t know your dinner table was missing—until now. Soft, fluffy, and buttery, these rolls are infused with fresh herbs and just the right touch of rustic charm from mashed potatoes.
Yep, you heard that right—actual mashed potatoes in your bread. It’s basically like the lovechild of your grandma’s Sunday bread and your favorite holiday side dish. Whether you’re hosting Thanksgiving or just craving something warm and doughy to dunk into soup, herbed potato rolls bring the flavor and the fluff. Oh, and they smell like a bakery and a garden had a baby. You’ll want to make a double batch—one for dinner, one for “testing” purposes. You’re welcome.
Table of Contents
What is Herbed Potato Rolls?
Herbed Potato Rolls are soft dinner rolls made with mashed potatoes (yes, real ones—not that boxed stuff) and fresh herbs like rosemary, chives, or thyme baked into the dough. The mashed potatoes aren’t just a quirky twist—they actually help keep the rolls super soft and pillowy. The herbs? Well, they add flavor, fragrance, and a hint of sophistication to what might otherwise just be “regular rolls.”
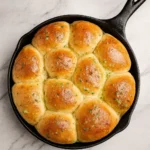
These beauties come out golden brown on the outside, melt-in-your-mouth on the inside, and have a whisper of savory herb flavor in every bite. Think of them as the cozy sweater of the bread world: comforting, classic, and always appropriate. Whether you’re making them for a holiday feast or just jazzing up soup night, herbed potato rolls are like a warm hug for your plate.
Reasons to Try Herbed Potato Rolls
If you’ve ever thought, “Store-bought rolls are fine,” these Herbed Potato Rolls are here to prove otherwise. First of all, that tender texture? It’s all thanks to mashed potatoes, which work magic by locking in moisture. Next up: flavor. With fresh herbs folded right into the dough, you’re not just eating bread—you’re eating something that tastes thoughtfully homemade. And the best part? They’re surprisingly easy to make, even if you’re not a seasoned baker.
They rise beautifully, smell incredible, and impress just about anyone lucky enough to grab one fresh from the oven. They also pair with everything—from hearty stews to brunch spreads. Once you make a batch, don’t be surprised if they disappear faster than you can say “pass the butter.”
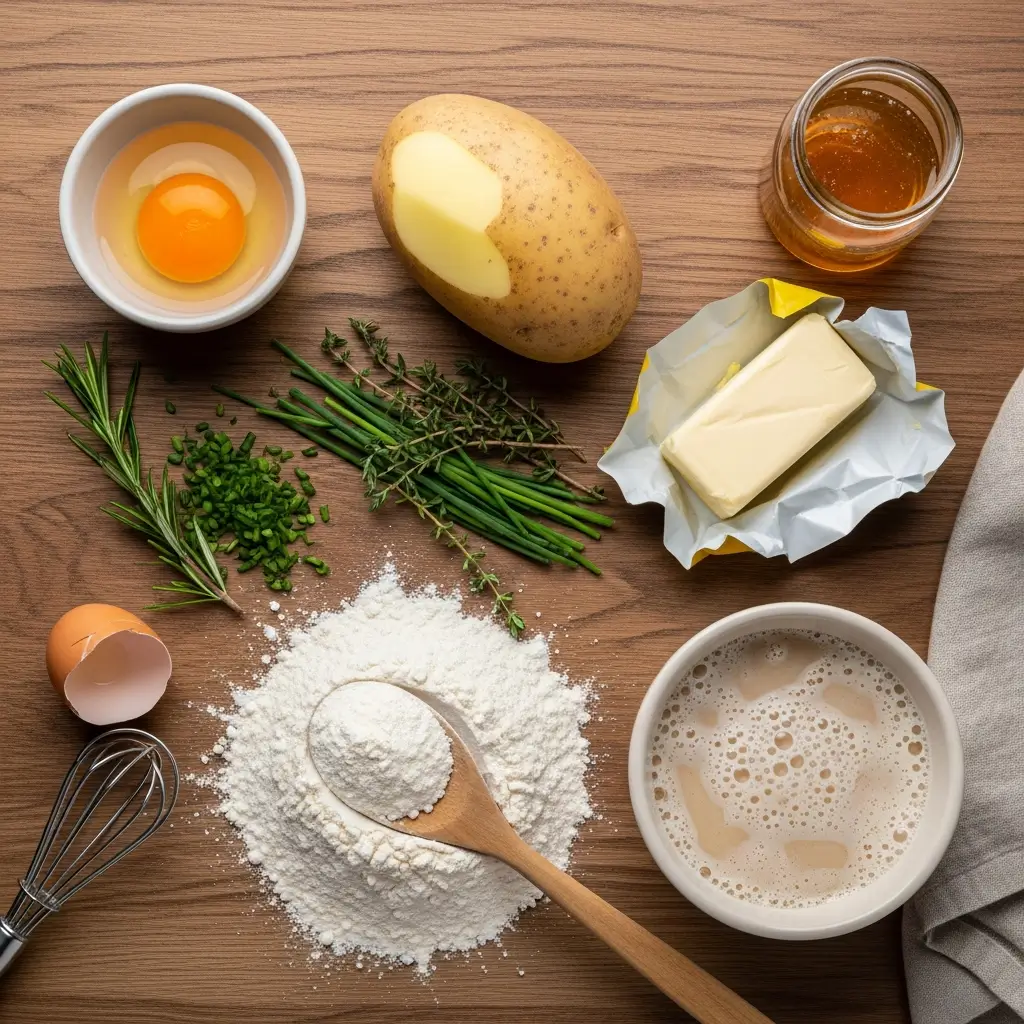
Ingredients Needed to Make Herbed Potato Rolls
- 1 russet potato
- ¾ cup reserved potato water
- 1 ¼ tsp traditional active dry yeast
- ¼ tsp sugar
- 1 egg, beaten
- 1 tbsp butter, melted
- 1 tbsp honey
- ½ tsp salt
- 2 tbsp chopped fresh herbs (try thyme, sage, chives, or rosemary)
- 2 ¾ cups all-purpose flour, plus extra as needed
- 2 tbsp flavored butter (like Garlic Scape Butter — see note)
Instructions to Make Herbed Potato Rolls
Making Herbed Potato Rolls might sound fancy, but it’s totally doable—even if you’re not a seasoned baker. This step-by-step guide will walk you through every part of the process, from prepping your potato to that golden, butter-brushed finish. Grab your mixing bowl, and let’s get baking.
Step 1: Boil and Mash the Potato
Start by peeling and dicing one russet potato into small chunks. Add them to a medium saucepan and cover with water—enough to rise about two inches above the potatoes. Bring to a boil over medium-high heat, then simmer until the pieces are fork-tender (about 10–12 minutes).
Once cooked, carefully drain the potatoes but reserve ¾ cup of the starchy water—you’ll use this later to create that pillowy soft dough. Mash the potatoes until smooth. You’ll need one cup of mashed potato for the dough. No lumps, please! If you’re new to mashing or need alternatives, check out our mashed potato prep tips for silky results.
Step 2: Activate the Yeast
In a small bowl, pour in ¼ cup of the reserved warm potato water, making sure it’s between 105°F and 115°F. Add in 1 ¼ teaspoons of active dry yeast and ¼ teaspoon of sugar to give the yeast something to snack on.
Stir gently and let the mixture sit for about 5 minutes. You’ll know it’s working when it gets bubbly and puffy on top—think of it as the yeast stretching before a workout. If it doesn’t foam up, your yeast might be expired—here’s a quick guide to working with yeast if you’re unsure.
Step 3: Mix the Dough
In the bowl of a stand mixer (or a large mixing bowl if working by hand), combine the remaining ½ cup of warm potato water, 1 cup of mashed potatoes, 1 beaten egg, 1 tablespoon of melted butter, 1 tablespoon of honey, and ½ teaspoon of salt.
Add the yeast mixture and your freshly chopped herbs—a blend of rosemary, thyme, sage, or chives works beautifully. Stir everything together until it resembles a loose batter.
Now, gradually add 2 ¾ cups of all-purpose flour, one cup at a time. Use a dough hook if you have one, or a sturdy spoon and some elbow grease if not. This is a sticky dough (totally normal), so don’t panic if it doesn’t look like a perfect ball yet.
Need a gluten-free version? Check out our Perfect Gluten-Free Hushpuppies for flour substitution ideas that won’t compromise flavor.
Step 4: Knead the Dough
Continue kneading with the dough hook on medium speed for about 5–6 minutes. If kneading by hand, transfer the dough onto a floured surface and knead for about 8 minutes. You’re looking for a soft, stretchy texture that pulls without tearing.
If the dough is clinging to the bowl or your hands too much, sprinkle in more flour one tablespoon at a time until it’s manageable—but don’t overdo it or the rolls will turn out dry instead of fluffy.
Step 5: First Rise (Let it Puff!)
Place the kneaded dough into a lightly oiled bowl and turn it over to coat all sides. This helps prevent a dry crust from forming. Cover with plastic wrap or a damp tea towel, and set it somewhere warm and draft-free.
Let it rise for about an hour, or until it doubles in size. If your kitchen’s chilly, pop the bowl into your (turned-off) oven with the light on to help speed things along. This is the magic moment where your dough starts transforming from dense to dreamy.
Step 6: Shape the Rolls
Once the dough has risen, gently punch it down to deflate—don’t worry, it’s supposed to feel soft and sticky. Sprinkle some flour on your counter, then knead the dough lightly to work out any large air bubbles.
Divide the dough into 12 equal portions (you can eyeball it or use a kitchen scale for even rolls). Shape each piece into a smooth ball by tucking the edges underneath.
Lightly grease a 10-inch cast iron skillet or a 9×13 baking dish. Arrange the rolls so they’re just touching—this helps them rise up instead of out. Cover loosely with a clean towel and let them rise again for 30 minutes.
Step 7: Bake Until Golden
Preheat your oven to 350°F while the rolls finish their second rise. When they’ve puffed up nicely, pop them in the oven and bake for 25–30 minutes, rotating the pan halfway through for even browning.
You’re looking for a golden top and a soft, springy texture. Tap the top—if it sounds hollow, they’re done!
Step 8: Brush with Buttery Goodness
Right out of the oven, brush the hot rolls with melted flavored butter, like garlic scape or herb butter. This adds a glossy finish and punches up the flavor.
Don’t have garlic scape butter? No worries—you can whip up a quick one using 2 tablespoons of melted butter mixed with a clove of minced garlic and a bit of chopped parsley. Or use your go-to from our Spinach and Artichoke Dip for a cheesy, garlicky twist.
Let the rolls cool just enough to handle, then dive in. Soft, warm, herby heaven.
What to Serve with Herbed Potato Rolls
These Herbed Potato Rolls are the kind of sidekick that makes everything else taste better. Pair them with rich stews like this Creamy Italian Meatball Soup, or let them soak up the warmth of a good Fennel and Potato Soup. Hosting brunch? Slide one alongside scrambled eggs or use it as the base for a breakfast slider. They’re also perfect with holiday mains—ham, turkey, roast beef, you name it. You can even turn leftovers into mini sandwiches or just eat them warm with butter and honey. (No judgment—we’ve all “accidentally” eaten three before dinner.)
Key Tips for Making Herbed Potato Rolls
Start with a fluffy mashed potato—no lumps! They’ll affect your dough texture. When proofing yeast, make sure your potato water isn’t too hot or too cold—lukewarm is perfect. Fresh herbs add the best flavor, but dried can work in a pinch (use half the amount). This dough is sticky on purpose—don’t over-flour it or your rolls will be dry. Letting the dough rise in a warm, draft-free place makes a big difference. And finally, brushing the rolls with melted butter after baking isn’t just for looks—it adds flavor and helps keep them soft. Got leftovers? Toast them with garlic butter for next-day magic.
Storage and Reheating Tips Herbed Potato Rolls
You’ve got leftovers (yay!), so let’s keep those Herbed Potato Rolls tasting fresh. Store cooled rolls in an airtight container at room temp for up to 2 days. Want to stretch their shelf life? Pop them into the fridge (wrapped tight) for 4–5 days, or freeze them for up to 2 months. To reheat, wrap them in foil and warm in a 300°F oven for 10–12 minutes. You can also microwave one (wrapped in a damp paper towel) for about 15–20 seconds. If they seem a bit dry, brushing them with melted butter before reheating brings them back to life. They’re also killer sliced and toasted—hello, mini herbed sliders.
FAQs
Can I use leftover mashed potatoes?
Sure, just make sure they’re plain—not loaded with cream, cheese, or garlic.
What herbs work best?
Rosemary, thyme, sage, and chives are great. Go with what’s fresh and smells amazing.
Can I make these rolls ahead of time?
Yes! You can refrigerate the shaped rolls overnight and bake the next day.
Do I need a stand mixer?
It helps, but you can knead the dough by hand. Just expect a bit of a workout!
Can I double the recipe?
Absolutely—these freeze beautifully, so go ahead and make extra.
Final Thoughts
Herbed Potato Rolls aren’t just a side—they’re a conversation starter. There’s something magical about fresh herbs and mashed potatoes working their way into golden, fluffy rolls that practically beg to be slathered in butter. They’re simple, comforting, and just elevated enough (without being fancy) to impress your dinner crowd. Whether you’re pairing them with soup, roasting a holiday bird, or just having a moment of carb appreciation, these rolls bring homemade warmth to the table. Try them once, and they’ll become a regular in your rotation.
Visit our Pinterest for regular slow cooker recipe updates, or join our Facebook discussions where cooking fans exchange their favorite hearty meal ideas.
PrintEasy Herbed Potato Rolls – Fresh, Fluffy & Crowd-Pleasing
These Herbed Potato Rolls are soft, fluffy, and bursting with the flavor of fresh herbs. Mashed russet potato adds moisture and tenderness, while a mix of thyme, sage, chives, and rosemary gives each bite a fragrant, savory finish. Perfect for special dinners or holiday meals.
- Prep Time: 15 minutes
- Cook Time: 30 minutes
- Total Time: 1 hour 45 minutes
- Yield: 12 rolls
- Category: Bread
- Method: Baking
- Cuisine: American
- Diet: Vegetarian
Ingredients
- 1 russet potato
- ¾ cup reserved potato water
- 1 ¼ tsp traditional active dry yeast
- ¼ tsp sugar
- 1 egg, beaten
- 1 tbsp butter, melted
- 1 tbsp honey
- ½ tsp salt
- 2 tbsp chopped fresh herbs, such as thyme, sage, chives, rosemary
- 2 ¾ cups all-purpose flour, plus extra as needed
- 2 tbsp flavoured butter, such as Garlic Scape Butter
Instructions
1. Peel and dice the potato. Add to a saucepan and cover with a couple inches of water. Bring to a boil and cook until tender. Strain and reserve 3/4 cup of the potato water. Mash the potatoes and set aside. You should have 1 cup of mashed potatoes.
2. In a small bowl combine 1/4 cup of the warm potato water (105 – 115°F) with the yeast and sugar. Stir briefly and then set aside for the yeast to activate. When the yeast is bubbly and risen, after about 5 minutes, proceed with the recipe.
3. In the bowl of a stand mixer combine the remaining 1/2 cup of warm potato water, mashed potatoes, beaten egg, melted butter, honey, chopped herbs, salt and the yeast mixture. Add the flour and attach the dough hook.
4. Mix, using the dough hook, until the dough starts to come together. Scrape down the sides occasionally to encourage the dough to come together. This is a soft and sticky dough so you will likely need to add extra flour, a tablespoon at a time, to prevent the dough from sticking to the bowl.
5. Continue mixing with a dough hook for about 5 minutes until the dough is soft and stretchy. Turn the dough out onto a floured counter and knead to bring it together into a smooth ball. Transfer the dough to a greased bowl. Drizzle a little more oil on top of the dough and rub it all over. Cover with cling film or a tea towel and then set in a warm place to rise for 1 hour.
6. After the dough has risen for 1 hour, punch it down to deflate completely. Lightly knead the dough to remove any air bubbles. The dough will be soft and very sticky, this is normal – add flour as needed while shaping the rolls.
7. Divide the dough into 12 equal pieces. Shape each piece into a small ball. Spray a 10-inch cast iron pan with non-stick spray. Alternatively, use a 9″ x 13″ baking dish. Arrange the rolls in the pan. Cover with a tea towel and let rise for 30 minutes.
8. While the dough is rising, preheat the oven to 350°F. Bake the rolls for 25 to 30 minutes until golden brown and cooked all the way through. Rotate the pan in the oven after 15 minutes to encourage even browning.
9. If desired, the rolls can be brushed with melted butter, such as Garlic Scape Butter, after baking. Brush the rolls immediately after removing from the oven so that they absorb the butter. Enjoy!
Notes
If you don’t have Garlic Scape Butter you can use another flavoured butter, such as garlic, or even plain butter.
To make a small batch of garlic butter, combine 1 clove minced garlic with 2 tbsp melted butter and a little chopped parsley.