Easy Honey Garlic Chicken is the kind of dinner you’ll want on repeat. Why? Because it’s fast, it’s flavorful, and let’s be real—sometimes we just want a dinner win without dirtying every dish in the kitchen. If your evenings are anything like mine, you’re juggling a job, kids, a dog that barks at air, and a fridge that always seems to be missing just one ingredient.
This honey garlic chicken recipe hits that sweet spot—minimal prep, pantry-friendly, and ready in 20 minutes. Plus, it’s one of those meals that even picky eaters tend to inhale without complaint. Whether you’re trying to impress your partner or just need to whip up something comforting after a long day, this sticky-sweet garlic-packed chicken brings the flavor without the fuss. Spoiler alert: it’s even better than takeout, and your wallet will thank you.
Table of Contents
What is Easy Honey Garlic Chicken?
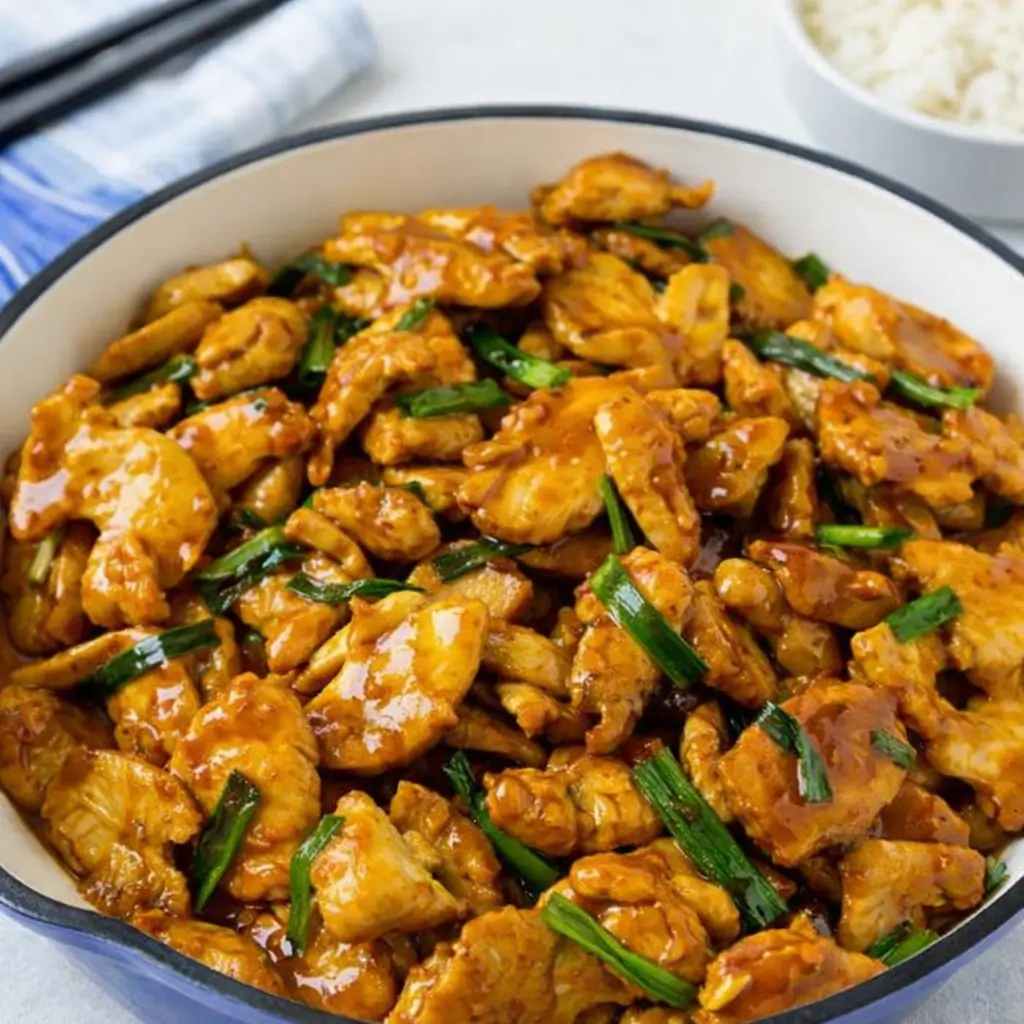
Easy Honey Garlic Chicken is a quick stir-fry style recipe featuring juicy, pan-seared boneless chicken thighs coated in a glossy, garlicky honey-soy glaze. It’s that sweet-meets-savory combo that has you sneaking bites straight from the pan before it even hits the plate. Originating from the fusion of Asian-inspired flavors, this dish pulls together pantry staples like soy sauce, honey, garlic, and rice vinegar to create a sauce that’s equal parts tangy, sticky, and finger-licking good.
And don’t let the bold flavors fool you—it’s totally beginner-friendly. No fancy skills required. If you’ve got a frying pan and 20 minutes, you’ve got this dish. Best of all, it pairs beautifully with steamed rice or noodles, soaking up every drop of that rich, glossy sauce. Think comfort food, but lighter and way quicker.
Reasons to Try Easy Honey Garlic Chicken
Let’s be honest—weeknight dinners can feel like an Olympic sport. That’s why Easy Honey Garlic Chicken is such a winner. First, it’s lightning fast. You can go from fridge to table in under 25 minutes—faster than your favorite takeout app can say “estimated delivery time.” Second, the ingredient list is short and sweet. Most of what you need is probably already hanging out in your kitchen.
Third, it’s a total crowd-pleaser. Sweet, salty, garlicky goodness? Kids love it, partners devour it, and leftovers (if there are any) reheat like a dream. Plus, the sauce? Oh, the sauce. It’s sticky, rich, and makes plain old rice taste extra. This recipe is ideal for busy families, last-minute guests, or those “I’m too tired to cook but still want real food” nights. And if you’ve been looking for something cozy yet bold, this is your new go-to.
Ingredients Needed to Make Easy Honey Garlic Chicken
- 8 boneless, skinless chicken thighs
- 2 tablespoons cornflour (cornstarch)
- ½ teaspoon salt
- ½ teaspoon black pepper
- 2 tablespoons vegetable oil
- 1 tablespoon unsalted butter
- 4 cloves garlic, minced
- ⅓ cup (110g) honey
- ⅓ cup (80ml) chicken stock
- 1 tablespoon rice vinegar
- 1 tablespoon light soy sauce
- For serving:
- 1 tablespoon chopped parsley
- ½ teaspoon chili flakes
- Boiled rice

Instructions to Make Easy Honey Garlic Chicken
Making Easy Honey Garlic Chicken is a breeze when you follow this step-by-step guide. Whether you’re a kitchen newbie or a seasoned home cook, these detailed instructions will walk you through every stage of the process — no guesswork, no stress. Let’s get cooking!
Step 1: Prep and Coat the Chicken
Start by grabbing your chicken thighs — make sure they’re boneless and skinless. If they’re still a bit thick, you can pound them out lightly with a rolling pin for quicker and more even cooking. Toss the chicken into a large mixing bowl. Sprinkle in the cornflour (cornstarch), salt, and pepper. Use your hands or tongs to mix until every piece is evenly coated. This step gives your chicken that lightly crispy coating and helps the honey garlic sauce stick like magic. If you’re wondering whether you can swap thighs for breasts, you can! Just check out our tips in the ingredient swaps section above for how to get the best texture with chicken breasts.
Step 2: Sear the Chicken for Flavor
Next, heat vegetable oil in a large frying pan or skillet over high heat. The pan should be hot enough that the chicken sizzles as soon as it touches the surface. Carefully place the chicken thighs in the pan — don’t overcrowd them. Cook undisturbed for 4-5 minutes, letting the bottom get golden and slightly crispy. Flip each piece and cook for another 2 minutes. This step-by-step searing builds bold, rich flavor before the sauce even hits the pan. It’s also where that irresistible crispy edge starts to form.
Step 3: Add Butter and Garlic
Now it’s time for the garlic moment — the heart of the flavor! Reduce the heat to medium to avoid burning the garlic. Add unsalted butter to the pan, and once melted, toss in the minced garlic. Stir continuously for about 30 seconds to a minute. The aroma is chef’s kiss. This is a great point to multitask — maybe start prepping your boiled rice or a quick veggie side like sautéed broccoli. Just don’t walk away from the pan — garlic goes from golden to bitter in a flash.
Step 4: Whisk Together the Sauce
While your garlic is sizzling, grab a small bowl and whisk together the sauce ingredients: honey, chicken stock, rice vinegar, and light soy sauce. This combo is the perfect balance of sweet, salty, and tangy. No rice vinegar in the pantry? No worries! Sub with apple cider vinegar and a touch of sugar — we talk about that and more in our ingredient swaps guide. Once mixed, give the sauce a quick taste (optional, but encouraged) — it should be bold and balanced.
Step 5: Simmer and Thicken the Sauce
Pour the sauce mixture into the skillet over the chicken. Turn the heat back up to medium-high and bring everything to a gentle boil. Then reduce to a simmer and let it bubble away for 4–5 minutes. You’ll notice the sauce thickening, clinging to the chicken in all the right ways. Stir occasionally to coat the thighs evenly and prevent sticking. This step-by-step simmering ensures the chicken cooks through while developing that sticky, shiny glaze. The chicken should be fully cooked (no pink in the middle), and the sauce should coat a spoon.
Step 6: Garnish and Serve
Once the sauce has thickened to your liking, remove the pan from heat. Sprinkle over fresh chopped parsley and a pinch of chili flakes for a touch of color and gentle heat. If you like things spicier, feel free to add extra flakes or even a drizzle of sriracha. Serve the chicken hot over your favorite rice — or for a comforting combo, pair it with creamy paprika chicken drumsticks on the side.
What to Serve with Easy Honey Garlic Chicken
This dish was made for rice. Boiled, steamed, fried—doesn’t matter, it’ll soak up that sauce like a champ. But if you want to get fancy (or just add more veggies), try it with some stir-fried bok choy, roasted broccoli, or even a crisp cucumber salad. A side of classic homemade chicken noodle soup adds cozy vibes to the table, especially in chillier months. Or serve it next to hot honey chicken cutlets for a sweet-spicy chicken night spread. Want something even heartier? Toss it over noodles for a fast noodle bowl dinner. You can also pair it with sautéed green beans or a quick cabbage slaw. It’s versatile, easy to match, and deliciously low-stress.
Key Tips for Making Easy Honey Garlic Chicken
- Don’t skip the cornflour—it’s the secret to that light crisp and a velvety sauce texture.
- Chicken thighs work best, but if using breasts, slice them into strips for quicker cooking.
- Keep that garlic moving in the pan; nobody wants burnt garlic.
- Want more heat? Add a pinch of red pepper flakes into the sauce instead of just on top.
- No rice vinegar? Use apple cider vinegar plus ¼ tsp of sugar as a quick sub.
- Leftovers? They’re even better the next day (just ask my husband who always “accidentally” makes too much rice).
- Sauce too thin? Let it bubble just a minute longer—but don’t walk away!
- Keep the pan hot when searing the chicken for the best color and flavor.
Storage and Reheating Tips for Easy Honey Garlic Chicken
Leftovers? Lucky you! Store cooled honey garlic chicken in an airtight container in the fridge for up to 3 days. To reheat, pop it in a 350°F (180°C) oven covered with foil for 12-15 minutes. It keeps the moisture in and brings back that just-cooked texture. You can also warm it in a skillet over medium heat if you’re in a hurry—just add a splash of water or stock to loosen the sauce.
Freezing? Yep, it freezes well. Let it cool, store in a freezer-safe container, and freeze for up to 2 months. Thaw overnight in the fridge and reheat as above. Keep in mind: while it’ll still taste amazing, the texture might change slightly after freezing. Still, definitely worth saving a batch for lazy weeknights.
FAQs
Can I use chicken breast instead of thighs?
Totally. Just cut into strips or pound flat so it cooks evenly.
Is this recipe gluten-free?
It can be! Use tamari instead of soy sauce, and double-check that your chicken stock and vinegar are gluten-free.
How spicy is it?
As written, it’s pretty mild. Want to dial it up? Add more chili flakes or a dash of sriracha.
What can I use instead of rice vinegar?
Apple cider vinegar or white wine vinegar + a touch of sugar works great.
Can I double the sauce?
Yes, and honestly—why wouldn’t you?
Final Thoughts
Easy Honey Garlic Chicken is proof that dinner doesn’t have to be complicated to be delicious. It’s quick, comforting, and uses ingredients you probably already have. Whether you’re cooking for a hungry family, a picky eater, or just your future self (hello, leftovers!), this recipe’s got your back. Keep it in your rotation for those “what’s for dinner?” nights and watch it become one of your regulars. Hungry for more chicken magic? Check out our Garlic Parmesan Chicken Bake or the crowd-favorite Copycat Costco Chicken Bake. Dinner is served!
Visit our Pinterest for regular slow cooker recipe updates, or join our Facebook discussions where cooking fans exchange their favorite hearty meal ideas.
PrintEasy Honey Garlic Chicken – Quick & Delicious Favorite

Sticky tender boneless chicken thighs in a garlic, soy, and honey sauce. Minimal ingredients, simple to prepare, and ready in 20 minutes!
- Prep Time: 5 minutes
- Cook Time: 15 minutes
- Total Time: 20 minutes
- Yield: 4 servings
- Category: Dinner
- Method: Pan-Fried
- Cuisine: Asian, Chinese
Ingredients
- 8 chicken thighs (skinless and boneless)
- 2 tbsp cornflour (cornstarch)
- ½ tsp salt
- ½ tsp pepper
- 2 tbsp vegetable oil
- 1 tbsp unsalted butter
- 4 cloves minced garlic
- 110 g (1/3 cup) honey
- 80 ml (1/3 cup) chicken stock
- 1 tbsp rice vinegar
- 1 tbsp light soy sauce
- To Serve:
- 1 tbsp finely chopped fresh parsley
- ½ tsp chilli flakes
- Boiled rice
Instructions
1. Place the chicken thighs in a bowl and add the cornflour (cornstarch), salt, and pepper. Toss the chicken in the cornflour until fully coated.
2. Heat the oil in a large frying pan (skillet) over a high heat.
3. Add the chicken thighs, and cook on one side until golden brown (about 4–5 minutes), then turn over and cook for a further 2 minutes.
4. Add the butter to the pan, let it melt, then add the garlic and stir together. Turn the heat down to medium so the garlic doesn’t burn.
5. To make the sauce, combine the honey, chicken stock, rice vinegar, and light soy sauce in a bowl and stir together.
6. Add the sauce to the pan. Turn the heat up and bring the sauce to the boil, then simmer for 4–5 minutes until the sauce reduces and thickens, and the chicken is cooked through (no longer pink in the middle).
7. Sprinkle on the chopped parsley and chilli flakes. Serve over boiled rice.
Notes
You can replace chicken thighs with chicken breast. Slice into thick strips or flatten to ensure even cooking.
To make it gluten free, use tamari instead of soy sauce and ensure chicken stock and rice vinegar are certified gluten free.
This dish freezes well but the chicken may be slightly less tender. Cool completely before freezing and reheat in the oven, covered with foil, at 180°C/350°F for 12–15 minutes.
For ingredient swaps, use apple cider vinegar or white wine vinegar plus 1/4 tsp sugar instead of rice vinegar. Light soy sauce can be swapped for 3/4 tbsp dark soy sauce. Use any high-heat neutral oil instead of vegetable oil.