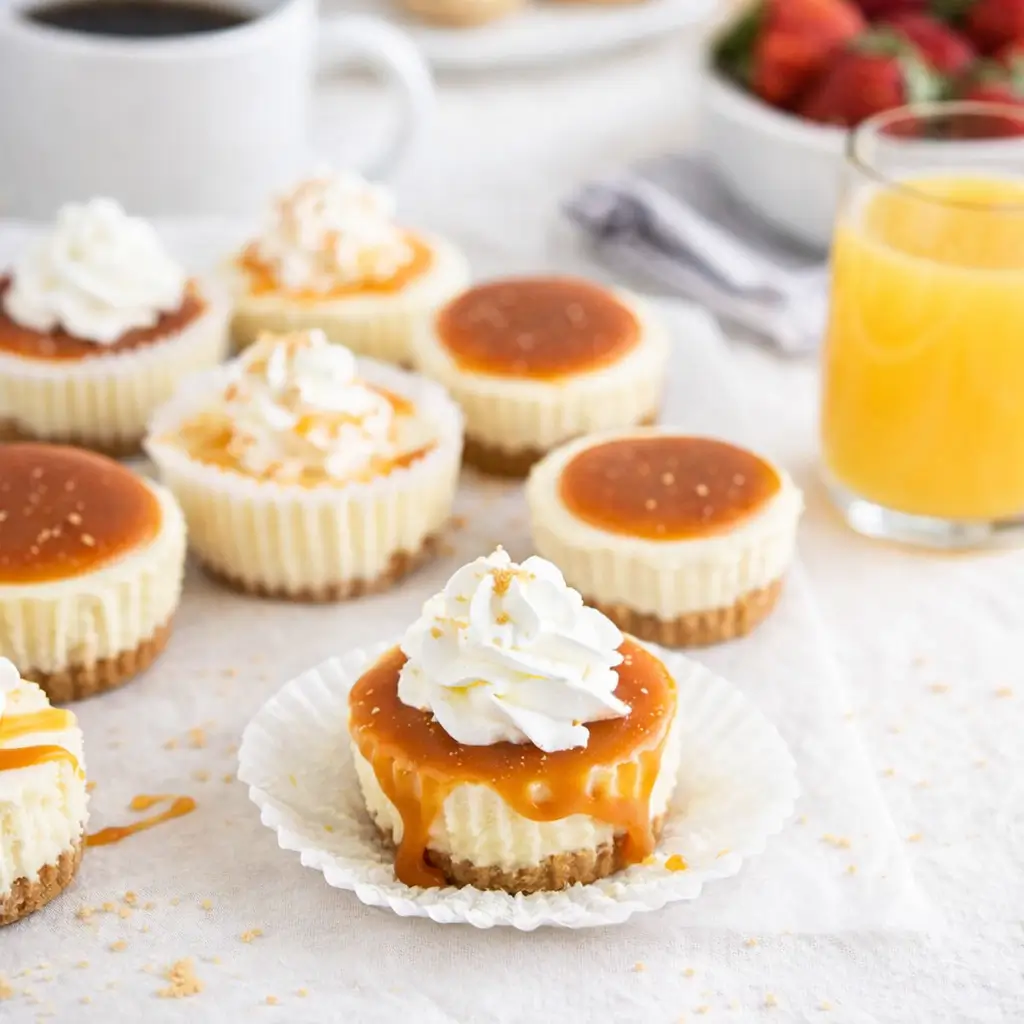
Mini Cheesecakes with Salted Caramel are your new best friend when it comes to stress-free desserts that still feel fancy enough to impress. Whether you’re wrangling toddlers, prepping for a dinner party, or just treating yourself after a long Tuesday (because Tuesdays are exhausting), these little gems check all the boxes. We’re talking buttery graham cracker crusts, creamy cheesecake filling, and that rich, glossy drizzle of homemade salted caramel.
They’re basically the dessert version of a cozy sweater—warm, comforting, and always a hit. Plus, portion-controlled, which means you can have two without the guilt trip. Or three. No judgment here. These Mini Cheesecakes with Salted Caramel are not only easy to make, but also freezer-friendly, crowd-pleasing, and perfectly customizable for holidays or casual get-togethers. And if you’ve ever had caramel sauce from a jar and thought “meh,” just wait until you taste this homemade version. It’s a whole new level. Let’s dive into what makes these mini cheesecakes so irresistible.
Table of Contents
What are Mini Cheesecakes with Salted Caramel?
Mini Cheesecakes with Salted Caramel are the bite-sized version of classic cheesecake, baked in cupcake liners and topped with a golden ribbon of homemade salted caramel. They’re the perfect mix of creamy and crunchy—think buttery graham cracker base, silky cheesecake middle, and a sweet-salty topping that makes your tastebuds do a happy dance.
Unlike a full-sized cheesecake that needs a springform pan and enough chill time to test your patience, these little beauties are way faster and easier. Each one is baked in its own cupcake liner, so there’s no slicing, no fussing, and no “oops-I-just-ruined-the-entire-cheesecake” drama. You can even make them ahead, pop them in the fridge (or freezer), and whip them out when your sweet tooth kicks in. Bonus? They’re totally portable—ideal for potlucks, bake sales, birthday parties, or even a midweek office treat that makes everyone think you’ve got it so together.
Reasons to Try Mini Cheesecakes with Salted Caramel
First of all, they’re adorable. Let’s not ignore the fact that everything tastes better when it’s mini. But beyond the cuteness factor, Mini Cheesecakes with Salted Caramel offer a foolproof way to get that rich cheesecake experience without the stress. Traditional cheesecakes can be a pain: water baths, cracks, long chill times. These? Easy-peasy. Also, since they’re individually portioned, you don’t have to stress over serving or slicing.
They’re perfect for events where you want to impress but don’t want to be stuck plating dessert while everyone else is mingling. The salted caramel adds a gourmet touch that makes it feel restaurant-worthy, but spoiler alert—it’s totally doable in your own kitchen. And if you’re dealing with picky eaters, this recipe is a win. You can skip the whipped cream or add extra caramel to customize for your crowd. Plus, they freeze like a dream, which means dessert can be as simple as defrost-and-serve.
Ingredients Needed to Make Mini Cheesecakes with Salted Caramel
For the Graham Cracker Crust:
- 1 1/4 cups fine graham cracker crumbs
- 5 tablespoons unsalted butter, melted
- 1 tablespoon granulated sugar
For the Cheesecake Filling:
- 16 oz full-fat cream cheese, softened
- 1/4 cup sour cream (don’t go low-fat here—trust us)
- 1/2 cup granulated sugar
- 2 large eggs, separated
- Pinch of salt
- 1/4 teaspoon vanilla extract
For the Salted Caramel Sauce:
- 1/2 cup granulated sugar
- 3 tablespoons heavy cream, warmed
- 2 tablespoons unsalted butter (European-style like Plugra if you can find it)
- 1/2 teaspoon fleur de sel or fine sea salt (plus extra for garnish if you’re feeling fancy)
Optional:
- Whipped cream (store-bought or homemade)
Instructions to Make Mini Cheesecakes with Salted Caramel
Prep and bake the graham cracker crust
Preheat your oven to 325°F and line a standard cupcake pan with liners. In a medium bowl, stir together the graham cracker crumbs, melted butter, and sugar until it feels like damp sand. Scoop about 2 tablespoons into each liner and press it down firmly—I like using the bottom of a shot glass for this. Bake for about 5–6 minutes. You don’t want it brown, just set. Let the crusts cool while you prep the filling.
Make the creamy cheesecake filling
In a mixing bowl, beat the cream cheese and sour cream together on medium speed until silky smooth. Lumpy cheesecake is not invited to this party, so make sure it’s fully blended. Add in the egg yolks, sugar, pinch of salt, and vanilla. Mix until smooth—low and slow is the game here to avoid too much air. Meanwhile, whip the egg whites to stiff peaks in a separate bowl. Gently fold them into the cream cheese mixture, being careful not to deflate all that fluffy goodness. This makes your cheesecake lighter and airier than the traditional dense style.
Fill and bake using a water bath
Pour the cheesecake filling into a piping bag or zip-top bag and snip the corner. Pipe the batter into your liners, filling them about 3/4 full. The filling will puff slightly as it bakes, so don’t overfill. Place your cupcake pan on a rimmed baking sheet, then carefully pour boiling water into the baking sheet until it reaches halfway up the sides of the cupcake wells. This DIY water bath helps prevent cracking and promotes even baking. Bake for 18–23 minutes. When they’re done, the centers should jiggle just slightly, kind of like Jell-O in the middle.
Cool and chill
Once baked, remove the cupcake pan from the water bath and let it cool at room temperature for 1 hour. Then transfer to the fridge and chill for at least 2 hours, preferably longer. This step is non-negotiable—cheesecake tastes way better when it’s had time to firm up and develop flavor.
Make the salted caramel sauce
In a heavy-bottomed saucepan, cook the sugar over medium heat, stirring only occasionally at first. Once it starts melting, stir more frequently. Use a wet pastry brush to wash down any sugar crystals clinging to the sides. Once the sugar turns a deep amber color (think brown paper bag), whisk in the butter until melted. Then slowly pour in the warmed cream, whisking like your life depends on it. It’ll bubble like crazy—that’s normal. Add your salt and give it one final stir. Strain the caramel if needed and let it cool in the fridge. If it stiffens up too much, microwave it for 20–30 seconds before using.
Assemble with love
When your cheesecakes are fully chilled, it’s time for the fun part. Warm your caramel if needed, and drizzle generously over each mini cheesecake. If you’re feeling extra, hit them with a pinch of sea salt on top or a swirl of whipped cream. But honestly, they’re divine just as they are.
Looking for more sweet treats that are great for gatherings? These Irish Cream Brownie Cookies are a fudgy dream, and this Berry Chantilly Cake is perfect for special occasions.
What to Serve with Mini Cheesecakes with Salted Caramel
These mini cheesecakes can easily steal the show, but they also play nicely with others. For a dessert spread, pair them with something fruity and bright like lemon blueberry pound cake or strawberry cheesecake cake. A fresh fruit salad on the side cuts the richness and adds a bit of color to your table. Serving these at a brunch? Coffee is a must—try a cinnamon-spiced blend or cold brew. If you’re feeling fancy, a glass of bubbly or a sweet dessert wine like Moscato is an excellent touch. And honestly, these cheesecakes are so rich and satisfying, sometimes all you need is a quiet moment and a fork.
Key Tips for Making Mini Cheesecakes with Salted Caramel
First, always soften your cream cheese properly. Cold cream cheese will never give you that smooth filling. Next, don’t skip the water bath—yes, it’s a bit extra, but it makes all the difference in texture. When making caramel, patience is your best friend. Don’t rush it or crank the heat. If you see sugar crystals forming, use that wet brush trick to avoid a grainy mess. Don’t overbake the cheesecakes—they should still jiggle a bit when done. And for clean, beautiful topping, drizzle the caramel after the cheesecakes are fully chilled. Want a shortcut? Sure, you could use store-bought caramel, but homemade has that magic touch. Finally, for best results, chill overnight. The flavor gets even better, trust me.
Storage and Reheating Tips for Mini Cheesecakes with Salted Caramel
These cheesecakes are perfect for making ahead. Store them in an airtight container in the fridge for up to 5 days. Just wait to add the caramel until serving if you want that glossy, fresh-drizzle look. For longer storage, freeze them (without toppings) for up to 2 months. Wrap individually in plastic wrap and then place in a zip-top freezer bag. Thaw overnight in the fridge before serving. If your caramel sauce has been chilled, just microwave it in short bursts until it’s pourable again. Cheesecakes don’t need reheating since they’re meant to be served chilled or at room temp, so that’s one less thing to worry about.
FAQs
Can I make these ahead of time? Absolutely! You can prep these up to two days in advance and store in the fridge. Just hold off on the toppings until you’re ready to serve.
What if I don’t have a piping bag? A zip-top bag with the corner snipped off works just fine. Or just spoon in the batter if you’re not worried about presentation.
Can I use low-fat cream cheese or sour cream? We don’t recommend it. The full-fat versions make a creamier, more satisfying cheesecake.
Is store-bought caramel okay? It’ll work in a pinch, but if you’ve got 15 minutes, the homemade stuff tastes way better.
Can I double this recipe? Yes! It scales beautifully, and since they freeze well, it’s worth making extra.
Final Thoughts
Mini Cheesecakes with Salted Caramel are one of those desserts that feel indulgent without being over-the-top. They’re fun to make, easy to serve, and a guaranteed crowd-pleaser. Whether you’re hosting friends or just need a sweet moment after a long day, these mini treats deliver every time. Their rich, creamy texture and salty-sweet topping make them a standout, and once you try them, you’ll be making them again and again. For even more cheesecake love, don’t miss our blueberry crumble cheesecake or these dreamy lemon blueberry mini cheesecakes. Happy baking!
Visit our Pinterest for regular slow cooker recipe updates, or join our Facebook discussions where cooking fans exchange their favorite hearty meal ideas.
PrintMini Cheesecakes with Salted Caramel – Easy & Sensational Dessert

Mini cheesecakes with a buttery graham cracker crust, light and fluffy filling, and a rich salted caramel drizzle, optionally topped with whipped cream. A perfect make-ahead dessert for any occasion.
- Prep Time: 2 hours 30 minutes
- Cook Time: 30 minutes
- Total Time: 3 hours
- Yield: 12–16 servings
- Category: Cheesecake
- Method: Baking
- Cuisine: American
Ingredients
**For the Graham Cracker Crust**
- 1 1/4 cups Fine graham cracker crumbs
- 5 tablespoons Unsalted butter, melted
- 1 tablespoon Granulated sugar
**For the Cheesecake Filling**
- 16 oz Full-fat cream cheese, softened
- 1/4 cup Sour cream (not low-fat)
- 1/2 cup Granulated sugar
- 2 Eggs, separated
- A pinch of Salt
- 1/4 teaspoon Vanilla extract
**For the Caramel Sauce**
- 1/2 cup Granulated sugar
- 3 tablespoons Heavy cream, warmed
- 2 tablespoons Unsalted butter (preferably European style)
- 1/2 teaspoon Fleur de sel or fine sea salt, plus extra for topping
Whipped cream (optional)
Instructions
1. Preheat oven to 325°F and line a standard cupcake pan with cupcake liners.
2. Combine graham cracker crust ingredients in a bowl and mix until moist.
3. Portion 2 tablespoons of crust mixture into each liner, press down to flatten, and bake for 5-6 minutes. Let cool.
4. In a bowl, mix cream cheese and sour cream with a hand mixer until smooth.
5. Add egg yolks, sugar, salt, and vanilla. Mix until smooth on medium speed.
6. In a separate bowl, whip egg whites to stiff peaks and gently fold into cheesecake mixture.
7. Transfer cheesecake mixture to a piping bag or freezer bag with corner cut off.
8. Fill cupcake liners 3/4 full with cheesecake filling.
9. Boil 6-7 cups of water. Place cupcake pan on a rimmed sheet pan in oven, pour boiling water around cupcake pan for a water bath.
10. Bake for 18-23 minutes, until centers are just barely jiggly.
11. Remove from oven, let cool at room temperature for 1 hour, then refrigerate at least 2 hours.
12. To make caramel sauce, heat sugar in a heavy saucepan on medium-low, stirring occasionally as it melts.
13. Use a wet pastry brush to wash down sides of pan to avoid crystallization.
14. Once sugar is deep amber (brown paper bag color), stir in butter, then whisk in salt and cream quickly.
15. Strain caramel if needed and refrigerate to cool.
16. Before serving, warm caramel slightly if stiff, and drizzle over chilled cheesecakes.
17. Top with extra salt and whipped cream if desired.
Notes
This is a Baker Street Society original recipe. You can skip the whipped cream for a more intense cheesecake and caramel flavor. The water bath is essential for even baking and avoiding cracks.